3D Design: Building Worlds Out of Thin Air (Kind Of)
3D Design… that phrase probably sounds cool, right? Maybe a little techy, like something only computer wizards do in dark rooms. But let me tell you a secret: it's really just like playing with digital clay, building stuff in a virtual sandbox. Only instead of getting your hands dirty, you're using your mouse and keyboard. I remember the first time I saw something rendered in 3D that looked *almost* real – like a shiny car or a fantasy creature. My mind was blown. How did they do that? It looked solid, like you could reach out and touch it. That curiosity was the tiny spark that eventually pulled me deep into the world of 3D Design.
It wasn't an instant love affair, mind you. There were lots of frustrating moments, things looking completely wrong, and hours spent just figuring out which button did what. But there was also this amazing feeling of taking an idea, something just floating around in my head, and making it actually *appear* on the screen. Like magic, but with polygons. Over time, messing around with shapes and textures went from a curious hobby to something I genuinely love doing. It's a creative outlet that constantly challenges me in new ways, and the results can be pretty mind-blowing, even if I'm still learning every single day. This journey into 3D Design has been wild, and I'm excited to share a bit of what I've learned, the good, the bad, and the downright weird.
So, What Exactly IS 3D Design? (Keep It Simple)
Okay, let's break it down without getting tangled in fancy words. Think about a regular drawing or photo. That's flat, right? Two dimensions – up and down, left and right. 3D Design adds the third dimension: depth. It's like building a sculpture, but instead of clay or stone, you're using software to create shapes that have height, width, AND depth. These shapes, often made up of tiny triangles or squares called polygons, can then be moved, twisted, stretched, and basically played with in a virtual space. You can look at them from any angle, just like a real object.
Once you have the shape (that's called modeling), you can add textures (like painting on the surface to make it look like wood, metal, skin, etc.), add lighting (to make shadows and highlights, just like the real world), and even make things move (animation). Put it all together, and you can create anything from a character for a video game, a product design before it's even built, a building you can walk through virtually, or even special effects for movies that look so real you can't tell what's fake anymore. That's the power of 3D Design – it lets you build anything you can imagine and make it look like it exists in the real world, or a totally made-up one.
Think of it like this: Drawing a house is 2D. Building a little model house out of LEGOs is 3D. 3D Design is like building that LEGO house, but inside your computer, and you have infinite LEGOs of any shape and color. You can make it look super realistic or totally cartoony. It's all about creating objects and environments in a three-dimensional digital space. That's the core idea behind 3D Design.
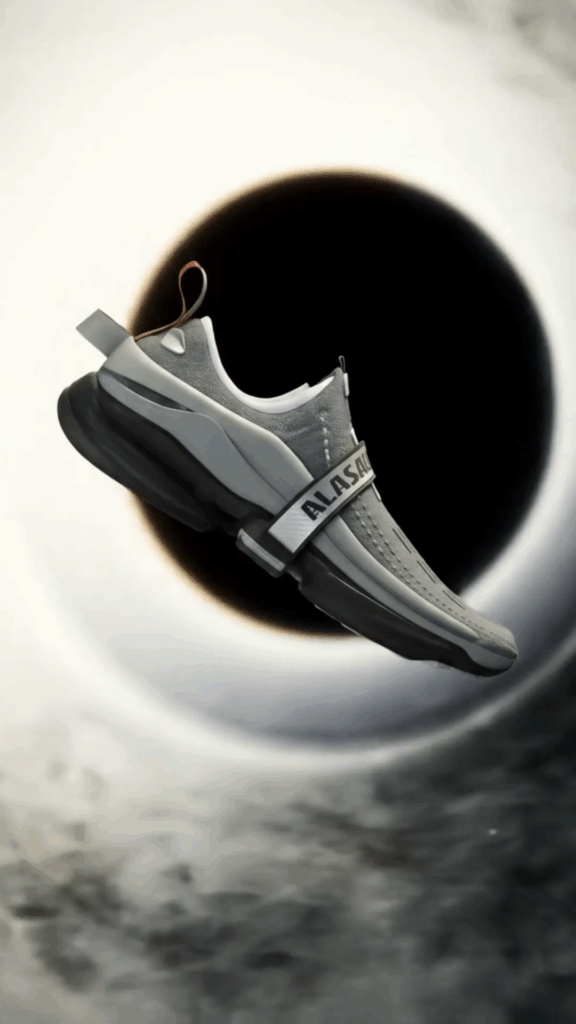
Learn more about the basics of 3D
My First Steps: The Humble (and Hilarious) Beginning
My journey into 3D Design didn't start with fancy classes or expensive software. Nope. It started with curiosity and some free, slightly confusing software I found online. I downloaded it, opened it up, and was immediately overwhelmed. Buttons everywhere! Menus I didn't understand! It felt like trying to fly a plane when I didn't even know how to start the engine. My first attempts were, frankly, pathetic. I tried to make a simple cube, and it looked lopsided. I tried to make a sphere, and it looked like a bumpy potato.
I remember trying to follow a tutorial to make a coffee cup. It seemed easy enough – start with a cylinder, stretch it, make a hole, add a handle. Simple, right? Wrong. My cylinder ended up looking like a squashed can, the hole was in the wrong place, and the handle looked more like a pretzel had attacked the cup. I got so frustrated I almost quit right there. It felt like my brain just wasn't wired for this 3D Design stuff. Everything I tried to create looked amateurish and just… wrong.
But something kept pulling me back. Maybe it was the little glimmers of potential I saw, or maybe just stubbornness. I started watching more tutorials, pausing and replaying, trying to copy exactly what the person on the screen was doing. I learned that making things look right in 3D Design isn't just about drawing; it's also about understanding space, light, and how shapes fit together. It was slow progress, really slow. For weeks, my creations were still pretty rough around the edges. But gradually, things started clicking. A simple table looked okay. A basic character head didn't look *too* creepy. That feeling of making something appear that wasn't there before kept fueling me.
It took a long time before I felt like I was actually *designing* things, rather than just fumbling around. Those early days were full of trial and error, mostly error, but they built the foundation for everything I learned later. If you're just starting out with 3D Design, know that it's okay to struggle! Everyone does. Don't compare your messy first tries to the polished work you see online. That stuff took years of practice. Just keep playing, keep experimenting, and don't be afraid to make ugly things. It's part of the process.
The Digital Toolbox: What You Use for 3D Design
So, what do you actually use to do 3D Design? There are tons of different software programs out there, and picking one can feel like trying to choose a superpower – they all do cool things, but some are better for certain tasks. Think of them as your digital toolbox. Some tools are great for sculpting organic shapes like characters or monsters. Others are better for precise, hard-surface modeling like cars, furniture, or buildings. Some are all-rounders that can do a bit of everything.
You've got software for modeling (building the shape), software for sculpting (like digital clay), software for texturing (adding colors and materials), software for rigging (adding a skeleton so you can pose or animate characters), software for animation (making things move), and software for rendering (taking your scene and turning it into a final image or video). Sometimes one program does many of these things, sometimes you use several together. It can sound complicated, but you usually start by focusing on one or two key areas, like just modeling.
Think of the software as your canvas and brushes, but way more complex. Learning a new 3D Design program is like learning a new instrument. It takes time and practice to figure out where all the notes are and how to play them together harmoniously. You start with the basics, like moving objects around, changing their size, and maybe making a simple cube or sphere. Then you learn how to edit those shapes, pushing and pulling vertices, edges, and faces (the tiny parts that make up your 3D model). It's a bit like digital surgery on shapes.
Don't feel pressured to use the most expensive or complicated software when you're starting. There are fantastic free options available that are powerful enough to create amazing things and learn all the fundamental skills. The most important tool isn't the software itself, but your willingness to learn, experiment, and practice consistently. Your brain and your hands (on the mouse/pen) are the real power tools in 3D Design.
From Idea to Object: The Magical Process of 3D Design
This is where the rubber meets the road, or I guess, where the mouse meets the mousepad. How do you actually take that cool idea bouncing around in your head and make it a reality in 3D space? It's a process, and like cooking, sometimes you follow a recipe, and sometimes you just wing it. Usually, it starts with an idea, right? Maybe you want to make a futuristic spaceship, a cozy little house, or a fantasy character with huge wings. Once you have the idea, it helps to gather some references. Look at pictures of real spaceships (or concept art), houses, or birds. This helps you figure out what makes them look the way they do.
Next, often, people will do some sketching, either on paper or digitally. You don't have to be a master artist! Simple stick figures or rough shapes are enough to get the basic form down. This stage is about planning. How big should it be? What are the main shapes? Where do the important parts go? Once you have a rough plan, you move into the 3D software for the modeling stage. This is where you start building the actual shape. You might start with simple shapes like cubes and cylinders and combine them, or you might use sculpting tools to mold a digital blob like clay. You focus on getting the main forms right first – the "block out." It's like building the basic structure of a building before adding windows or details. This part can be tricky because you're thinking in 3D, rotating your view constantly to see your model from all sides.
After you have the basic shape, you start adding details. If it's a spaceship, you add engines, wings, cockpits, maybe little antennae. If it's a character, you refine the face, hands, clothing. This detailing phase can take a long time, adding smaller shapes, carving in lines, making surfaces smooth or rough. As you work, you constantly check your model from different angles, making sure it looks good from every perspective. Sometimes you need to go back and adjust earlier shapes because they don't quite work with the details you're adding. It's a back-and-forth process of building, refining, and adjusting. One of the cool things about 3D Design is that you can always go back and change things; it’s much easier to undo a mistake than with real-world materials. As you model, you also need to think about how the parts will connect, especially if the object is meant to be rigged for animation or used in a game. The way the polygons are arranged, known as topology, is super important for making the model bend and deform correctly later on. A good understanding of topology comes with practice and learning how to make the "flow" of the polygons follow the natural lines and curves of your model, kind of like how muscles flow under skin or how panels line up on a car. Getting topology right can save you huge headaches down the line, especially in animation, where bad topology can lead to weird, unnatural deformations. It’s one of those things that beginners often overlook, leading to frustration later, but it’s a fundamental concept in creating clean, usable models in 3D Design. Building complex models takes patience and attention to detail, slowly adding piece by piece or carving away digitally until the form matches your vision. You might spend hours just perfecting one small part of a larger model, ensuring every curve is just right or every hard edge is crisp. It’s meticulous work, but seeing the model take shape from nothing is incredibly rewarding. The process can be iterative; you might finish a section, look at it from another angle, and realize it needs significant changes, then dive back in to rework it. This constant refinement is part of the journey of learning and improving your skills in 3D Design, pushing you to see and understand shapes in new ways. The challenge of translating a 2D concept or even just an idea in your head into a functional and aesthetically pleasing 3D model is a constant puzzle, and solving it piece by piece is what makes the process so engaging.  Sometimes, during this long modeling phase, you hit a wall. You get stuck, things don't look right, and you don't know why. That’s when taking a break, looking at more references, or asking for feedback from others can be really helpful. Stepping away and coming back with fresh eyes can make all the difference in overcoming a difficult modeling challenge. It's all part of the creative process, full of ups and downs, challenges and triumphs.
Once the modeling is done (or mostly done), you move to texturing. This is like painting your model and giving it materials. You create or find images (textures) and wrap them onto your model. You can make something look like smooth metal, rough wood, bumpy concrete, or anything else. You also work with things like roughness (how shiny it is), metallicness, and bumps to make the surface look realistic. After texturing comes lighting. Lighting is EVERYTHING in 3D Design. Good lighting can make a simple model look amazing, and bad lighting can make the best model look flat and boring. You add virtual lights to your scene, just like setting up lights for a photo shoot or a movie scene. You can control their color, intensity, and where they are placed to create shadows and highlights that define the shape and mood of your scene. Finally, there's rendering. This is the part where the computer calculates everything – the model, the textures, the lights, the camera angle – and creates the final 2D image or sequence of images (for animation). Rendering can take a long time depending on how complex your scene is and how realistic you want it to look. It's basically the computer doing all the heavy lifting to turn your 3D scene into a viewable picture or video. That whole process – from idea and planning, through modeling, texturing, lighting, and finally rendering – is the core of bringing something to life in 3D Design.
Oops! My Most Common 3D Design Mistakes (Learn From Me!)
Oh man, I could write a whole book just about the mistakes I've made in 3D Design. It's all part of learning, but maybe sharing some of my classic blunders will help you avoid them. One of the biggest ones early on was trying to add tiny details too soon. I'd be building a character, and before I even had the basic body shape right, I&d be trying to sculpt in fingernails or wrinkles. Big mistake! You end up having to redo everything when you realize the main form is wrong. Always focus on the big shapes first, then move to medium details, and finally the tiny stuff.
Another classic error: messy geometry. This ties into topology we talked about. Early on, I didn't care how I connected the lines and points (edges and vertices). The model looked okay from a distance, but if I tried to smooth it or bend it, it would pinch and deform in weird ways. Learning to keep your geometry clean and organized, with nice flows, makes everything else down the line so much easier, especially if you plan on animating. It's boring at first, but essential for good 3D Design.
Getting lost in settings was another huge one. 3D software has a million buttons and sliders. When I started texturing or lighting, I'd just randomly mess with settings hoping for the best. Didn't work! You need to understand what each setting does, even just the basic ones, like how light intensity or color affects the mood. Don't just click around randomly. Take a moment to look up what a setting does if you're unsure. A little bit of knowledge goes a long way in 3D Design.
And finally, trying to tackle projects that were way too big for my skill level. I'd see amazing complex scenes online and think, "I'll just make something like that!" Nope. I&d get overwhelmed, frustrated, and probably abandon the project. Start small! Make a simple object. Then combine a few simple objects into a small scene. Gradually increase the complexity as you learn and get more comfortable. Finishing small projects gives you confidence and builds your skills much faster than getting stuck on one giant, impossible task. Learn from my impatience! Start simple, finish what you start, and build up your skills gradually in 3D Design.
Where Do You See All This 3D Design Magic?
Okay, so maybe you're thinking, "Alright, building stuff on a computer sounds neat, but where is this actually used?" Oh, buddy, it's everywhere! Once you start noticing it, you'll see 3D Design woven into so much of the world around you. Obviously, movies and video games are huge. Think of all those incredible creatures, futuristic vehicles, and detailed environments you see in your favorite blockbusters or games. A massive amount of that is created using 3D Design.
But it's not just entertainment. Architects use 3D modeling to create virtual walkthroughs of buildings before they even break ground. Engineers use it to design products, from simple gadgets to complex machinery, testing them virtually before manufacturing. Car companies design new models in 3D, iterating on shapes and aerodynamics without needing to build physical prototypes early on. Medical professionals use 3D models of organs or bones for training, planning surgeries, or even creating custom implants based on patient scans. Imagine designing a prosthetic limb that perfectly fits someone using 3D Design!
Even things you buy in stores often started as a 3D model. Packaging, product prototypes, even the design of the store itself might have been planned out using 3D Design software. It's a tool used across so many industries to visualize ideas, communicate designs, and create things that would be difficult or impossible to make otherwise. Seeing something you worked on, maybe a chair design or a simple prop, appear in a final image or animation is a really cool feeling. It's a reminder that the skills you learn in 3D Design have real-world applications far beyond just making cool pictures.
Getting Better: The Never-Ending Practice of 3D Design
Just like learning any skill, getting good at 3D Design takes practice. Lots and lots of practice. There's no magic shortcut or secret button that instantly makes you an expert. You have to put in the hours, experiment, fail, and try again. The more you practice, the more intuitive the tools become, the better you understand how shapes work in 3D space, and the faster you can bring your ideas to life. Consistency is key. Even if it's just practicing for 30 minutes a day, doing it regularly is better than doing one huge session once a month.
One of the best ways to practice is to follow tutorials. Find tutorials for things you think are cool – making a sword, modeling a simple character, creating a textured material. Follow along step-by-step. Don't just watch; do it yourself in the software. This helps you learn the tools and workflows. Once you've followed a tutorial, try changing something. Make the sword design slightly different, change the colors of the material, try modeling a similar object without the tutorial. This pushes you to start thinking for yourself and applying what you've learned.
Another great way to improve is to challenge yourself. Try to model something you see around you, like your desk or a piece of fruit. Try to recreate a simple object from a photo. These kinds of exercises help you practice observing the real world and translating it into 3D Design. Don't be afraid to experiment with different software or techniques either. The 3D world is always changing, with new tools and workflows popping up. Staying curious and trying new things keeps the learning process fresh and exciting.
Joining online communities can also be super helpful. See what other people are making, ask questions when you're stuck, and share your own work to get feedback. It can be a little scary to show your stuff when you're learning, but constructive criticism is invaluable for getting better. Remember that everyone starts somewhere, and the journey in 3D Design is a marathon, not a sprint. Keep practicing, stay curious, and celebrate your progress, no matter how small it feels.
The Future Looks Wild for 3D Design
Looking ahead, the world of 3D Design is only going to get crazier and cooler. We're already seeing amazing things happening. Virtual Reality (VR) and Augmented Reality (AR) are becoming more common, and what do they need? Yep, tons and tons of 3D content! Imagine walking through a virtual museum filled with 3D sculptures, or seeing 3D models of furniture pop up in your actual living room using your phone. That's all powered by 3D Design.
Real-time rendering is also a big deal. This is technology that lets you see your 3D scene rendered almost instantly as you work on it, without waiting ages for the computer to calculate everything. This makes the creative process much faster and more interactive, letting you experiment with lighting and materials on the fly. It's like having a super-fast camera that instantly shows you exactly what your 3D Design looks like from any angle.
Even Artificial Intelligence (AI) is starting to play a role. While AI isn't going to replace 3D artists entirely anytime soon, it's already helping with tasks like generating textures, creating basic models, or optimizing meshes. Think of AI as a helpful assistant that can speed up some of the more repetitive parts of 3D Design, allowing artists to focus on the more creative aspects. This technology is developing rapidly, and it's exciting to think about how it might further change the way we approach 3D Design in the coming years.
As technology gets more powerful and easier to use, 3D Design is becoming more accessible to more people. What used to require super expensive computers and specialized training can now be done on more affordable hardware with increasingly user-friendly software. This means we're likely to see even more amazing and innovative uses of 3D Design in the future, from individual artists creating incredible personal projects to large companies using it in ways we can't even imagine yet. It's a field that's constantly evolving, and that's one of the things that keeps it so interesting.
More Quick Tips for Starting Your 3D Design Adventure
If you're feeling inspired to jump into 3D Design, here are a few extra tips based on my bumpy road:
- Don't Get Bogged Down: There are SO many things to learn. Don't try to learn modeling, texturing, lighting, animation, and rigging all at once. Pick one area, like modeling, and focus on that until you feel comfortable before moving on.
- Use References: I can't stress this enough. Whether you're making something realistic or stylized, having reference images helps you understand shapes, proportions, and details. Don't try to model a car without looking at pictures of cars!
- Save Often: Computers crash. Software glitches. Save. Your. Work. Constantly. Seriously, learn to hit that save button like it's your job. Losing hours of work is soul-crushing.
- Take Breaks: Staring at a screen for hours trying to get a few polygons right is tiring. If you feel frustrated or stuck, step away for a bit. Go for a walk, grab a snack, look at something else. Often, the solution becomes clear when you come back with a fresh mind.
- Don't Aim for Perfection (Early On): Your first models won't be perfect. And that's okay! The goal is to learn and improve with each project. Focusing too much on making something flawless when you're a beginner will just slow you down and frustrate you. Just try to make it a little better than the last one.
- Find a Community: Connect with other people learning or doing 3D Design. Online forums, social media groups, or local meetups (if you can find them) offer support, inspiration, and help when you get stuck. You're not alone in the learning process!
These little things can make a big difference in making your introduction to 3D Design less overwhelming and more enjoyable. Remember, the goal is to learn and create, so try to have fun with it!
My Ongoing Love Affair with 3D Design
Even after spending a good amount of time messing around in 3D space, the feeling of creating something from nothing still hasn't worn off. There's a unique kind of satisfaction in taking a blank canvas (or an empty 3D view) and populating it with shapes, colors, and light until it looks like a little piece of a different reality. It's a constant process of problem-solving and creative expression. How do I make this metal look old and rusty? How do I make this character's cloak fold naturally? How do I light this scene to feel spooky or inviting? These are the questions you grapple with every day in 3D Design.
It's also a field where you never really stop learning. New software updates come out with new features, new techniques are discovered and shared, and the possibilities of what you can create just keep expanding. There's always a new challenge to tackle, a new skill to master. This constant evolution is part of what makes working with 3D Design so exciting. It keeps you on your toes and pushes you to keep experimenting and improving.
Thinking back to my first lopsided cube, it's pretty wild to see how far things have come, not just for me personally, but for the whole field of 3D Design. What started as a niche skill for special effects has blossomed into a fundamental tool used across countless industries. It allows us to visualize the impossible, test ideas before investing huge amounts of money, and create immersive experiences that weren't possible before. Whether you're interested in making games, designing products, creating art, or something else entirely, chances are 3D Design can be a powerful tool to help you achieve your goals. It's a challenging but incredibly rewarding path, and I wouldn't trade my journey with 3D Design for anything.
Conclusion: Your Turn to Explore 3D Design
So there you have it – a peek into my experience with 3D Design. It started with simple curiosity, moved through a phase of frustration and learning, and has become a continuous process of creating and exploring. If you've ever been curious about how those amazing visuals in movies or games are made, or if you just have ideas you want to bring to life visually, I highly encourage you to give 3D Design a try. There are more resources available now than ever before, including powerful free software that lets you get started without spending a dime.
Be patient with yourself, celebrate the small victories, and don't be afraid to make mistakes – they're the best teachers. The world of 3D Design is vast and exciting, full of possibilities for creativity and innovation. Jump in, start building, and see where your imagination takes you in this incredible digital dimension. You might be surprised at what you can create.