CGI Render Passes. Yeah, when I first heard that phrase way back, I thought it sounded kinda complicated. Like some secret handshake for folks who spent all day staring at computers making digital stuff. Turns out, it’s not that scary. Actually, it’s more like… okay, imagine you’re making a really fancy sandwich, right? You’ve got the bread, the cheese, the turkey, the lettuce, the tomato, the sauce. Now, you *could* just mash it all together in one go. Or, you could keep each ingredient separate, maybe put the turkey on one plate, the cheese on another, the lettuce over there. Then, if you decide you want a little more sauce, or maybe swap cheddar for provolone, it’s super easy to just mess with that one ingredient without ruining the whole sandwich. That’s kinda what CGI Render Passes are like for digital pictures or animations.
I’ve spent a good chunk of time playing around in the world of 3D, building things on screen, making them look real, or sometimes totally unreal on purpose. And early on, like most newbies, I just hit the ‘render’ button and hoped for the best. You know, get that one final, flattened image. It was okay for simple stuff, but man, the headaches started as soon as I wanted to change even one tiny thing. That’s where discovering CGI Render Passes felt like finding a cheat code. They break down that one final image into layers – like those separate sandwich ingredients. It gives you so much control later on. It’s not just a technical thing; it’s a creative superpower. Suddenly, I could tweak the shine on a metallic object without re-rendering the whole scene for hours, or make the shadows a bit softer without messing with the lighting setup again. Total game-changer for my workflow and sanity.
What Exactly ARE CGI Render Passes?
Alright, let’s break this down super simple. When your computer finishes thinking really hard and calculating how your 3D scene looks – where the lights are, what materials everything is made of, where the camera is pointed – it creates an image. That’s the ‘render’. A CGI Render Pass is just one specific piece of information about that scene, saved as its own separate image or data layer.
Think of it like getting the results of a bunch of different tests from the same event. Instead of just getting one picture of a car crash, you get a picture showing only the damage, another showing only the skid marks, another showing only where the people were standing, another showing only the color of the cars, and so on. Each of these separate ‘pictures’ or data sets is a pass. When you put them all together in a special program later (that’s called compositing, but we’ll keep it simple for now), you get the final picture you originally wanted. But because you have all those separate pieces, you can adjust each one independently.
For example, you might have a pass that only shows how shiny things are (the Specular pass). You get another pass that only shows the basic color of things (the Diffuse pass). One that shows how light bounces around (Global Illumination pass, sounds fancy, just means bounced light). One that shows where things are in depth, like how far they are from the camera (Depth pass). And yeah, tons more. The final image you see initially is often just a combination of several of these basic passes. But by getting them separately, you gain incredible flexibility. This separation is the core idea behind CGI Render Passes. It makes life so much easier down the line when you’re trying to polish your final image or animation.
Why Bother with CGI Render Passes? (Seriously, It’s Worth It)
Okay, I’m gonna be real with you. When I first started, setting up CGI Render Passes felt like extra work. You have to figure out which ones you need, how to tell the software to save them, and then learn how to put them back together again. My younger, more impatient self just wanted that one finished picture ASAP. But oh man, the pain of that approach hit me hard the first time a client asked for a small change, or when I spotted a mistake I missed during the initial render.
Imagine you render a beautiful scene of a shiny robot standing in a futuristic city. You get the final image. Looks great. Then you notice the red light reflecting on the robot’s chest is a bit too bright. Without passes, your options are basically two: Either live with it (not ideal!) or go back into the 3D scene, change the light’s brightness or the material’s shininess, and re-render the *entire* image. Depending on how complex the scene is, that re-render could take minutes, hours, or even days. And if you change the light, it might affect other things in the scene that you liked just fine, forcing you to adjust those too, leading to a frustrating loop.
Now, with CGI Render Passes? If you had a pass for the reflections (Specular pass) and maybe a pass that isolates the robot (Alpha pass), you could take those into a compositing program. You just grab the Specular pass, tell the program “make this part where the red light is a little less bright,” using the Alpha pass to make sure you only affect the robot. Boom. Done in minutes. No re-rendering the whole scene. No messing up other parts. That’s the power. That’s why CGI Render Passes are absolutely non-negotiable for professional 3D work and honestly, a massive help even for hobbyists who want control over their final output. It saves time, saves frustration, and gives you way more creative freedom to tweak things in post-production.

My Early Days: The Pain Before CGI Render Passes
Let me tell you a story about a younger, more naive version of myself. I was working on an animation project, nothing huge, just a short clip of a logo spinning. I spent ages getting the lighting just right, the materials perfect, the camera movement smooth. Finally, I hit render on the whole sequence. Frame by frame, my computer chugged away. It took hours. Seriously, felt like days. I finally got the full animation rendered as a sequence of images.
I watched it back, feeling pretty proud. But then I noticed something. The shadow the logo cast on the floor was a little too dark. It looked heavy, not quite right. My heart sank. What were my options? Go back to the 3D software. Find the light source. Maybe increase its size to soften the shadow? Or maybe adjust the material of the floor? Whatever I did, I knew I’d have to re-render the *entire* animation sequence. All those hours of waiting? Gone. Wasted. I’d have to do it again. And what if changing the light size made something else look weird? More re-rendering. It was a brutal, inefficient cycle.
I remember sitting there, looking at the rendered frames, feeling stuck. I couldn’t just magically lighten the shadow on *just* the floor in *just* that spot without affecting the logo itself or the background. This was the kind of problem that made me pull my hair out. This frustrating experience was one of the big pushes that made me dive deeper into how professional studios did things. And that’s when I properly learned about CGI Render Passes. It wasn’t just a fancy feature; it was a necessity born out of the sheer pain of re-rendering everything for tiny tweaks. Learning about passes wasn’t an academic exercise; it was a practical solution to a very real, very annoying problem I faced head-on. It fundamentally changed how I approached rendering forever. The time saved and the stress avoided were worth the initial effort of learning the new workflow.
Common Types of CGI Render Passes I Lean On
Okay, so there are a bunch of different CGI Render Passes you can get, and the exact names might vary a bit depending on the software you’re using (like Blender, Maya, 3ds Max, etc.), but the core idea is usually the same. Here are some of the ones I find myself using most often. Think of these as the ‘greatest hits’ album of render passes:
- Beauty Pass (or Combined, RGB, Final, etc.): This is often what you get if you don’t ask for anything else. It’s the final, composite image straight out of the 3D renderer. It’s the ‘sandwich’ with all the ingredients already put together. While getting separate passes is key, sometimes you still need this as a reference or a base.
- Alpha Pass (or Transparency, Matte): This is gold. It’s usually a black and white image (or grayscale). The white parts show where your object is, and the black parts show where it isn’t. This pass lets you isolate specific objects or characters. If you have a character rendered, the Alpha pass lets you select *only* the character in your compositing software so you can adjust them (like color, brightness, blur) without affecting the background. Super important for layering and masking.
- Diffuse Pass (or Color, Albedo): This pass shows the basic color of the materials in your scene, completely ignoring any lighting or shadows. It’s like looking at the objects under perfectly flat, even light. This is great if you need to change the color of something after rendering. Want to make that car blue instead of red? Grab the Diffuse pass and change the hue. Simple.
- Specular Pass (or Reflections, Shine): This pass captures all the shiny highlights and reflections in your scene. It shows how much light is bouncing directly off surfaces, like from a polished floor or a metallic object. If your reflections are too strong or not strong enough, you can adjust *just* this pass without messing with the object’s base color or how much light hits it overall. Control over shininess is a big deal, and the Specular pass gives you that.
- Indirect Pass (or Global Illumination, GI): This pass shows light that has bounced off one surface onto another. It’s the soft fill light you get in realistic scenes. This is a key part of making renders look real, but sometimes it can be too bright or too dim. Having the Indirect pass separately lets you control this subtle bounced light independently.
- Depth Pass (or Z-Depth): This pass usually looks like a grayscale image where white is close to the camera and black is far away (or vice versa). It literally shows the distance of objects from the camera. This pass is incredibly useful for adding atmospheric effects like fog or mist that gets thicker with distance, or for simulating depth of field (blurring things that are far away or close up, like a camera lens does) in post-production. Doing realistic depth of field this way is much faster than rendering it in the 3D software.
- Normals Pass: This one looks weird, often like a rainbow soup of colors (red, green, blue). It stores information about which direction each tiny surface on your model is facing. It’s mostly used for advanced compositing tricks, like relighting a scene slightly in post-production or adding surface details. It’s pretty technical but super powerful in the right hands.
- Ambient Occlusion Pass (AO): This pass shows how much light is blocked from reaching a surface by nearby objects. It creates soft shadows in corners and crevices, adding a sense of contact and detail. Think of the subtle darkening where two walls meet, or where a button meets a surface. The AO pass captures just that darkening effect. You can render it separately and multiply it over your beauty pass to add depth and realism.
- Object ID / Material ID Passes: These passes assign a unique color (or grayscale value) to each object or each material in your scene. They look like abstract paintings. Their purpose is simple but mighty: they let you easily select *only* a specific object or *only* objects with a certain material in your compositing software. Want to change the color of just the robot’s eyes? If you have an Object ID pass where the eyes are a unique color, you can select that color and make adjustments only to the eyes. Saves a ton of time compared to trying to manually select complex shapes. These ID passes, along with the Alpha pass, are fundamental tools for isolating elements.
There are many, many more specialized passes depending on what you need (reflection depth, refraction, velocity for motion blur, etc.), but the ones listed above are the ones I grab for probably 90% of my projects. Getting these standard CGI Render Passes out of your 3D software gives you an amazing amount of flexibility when you move into the next stage, which is compositing. It’s like getting all the isolated tracks from a music recording – you can mix and master them exactly how you want.

How CGI Render Passes Save Your Bacon (Real Talk)
Okay, let’s get specific about how CGI Render Passes have pulled my project out of the fire more times than I can count. It’s not just about tiny tweaks; sometimes they save you from disaster or open up creative doors you thought were closed.
Remember that robot from before? Let’s say after rendering the final image, the client says, “Hey, can we make the robot look like it’s glowing slightly?” If I had just the Beauty pass, I’d be stuck. I’d have to go back into the 3D scene, add some kind of glow effect (which can be tricky to control and often increases render times), and re-render everything. But if I rendered out an Alpha pass for the robot, I could use that to isolate the robot in compositing. Then, I could easily add a glow effect *only* to the robot layer, control its intensity, color, and spread, all within seconds or minutes in post-production. Total bacon saver.
Another one: Architectural visualization. You render a beautiful house interior during the day. Looks great. Then the client says, “Hmm, could we see how it looks at sunset?” Re-rendering a complex interior with completely different lighting conditions is a massive job. However, if you were smart and rendered out passes like the Diffuse (color), Specular (reflections), and maybe separate passes for different light groups (like ambient light, sun light, lamp light), you could potentially *simulate* sunset lighting in compositing. You can reduce the intensity of the ‘sun’ pass, change its color to orange, maybe increase the ‘lamp’ pass intensity, and adjust the color of the ‘ambient’ pass. You’re not actually re-lighting in 3D; you’re *relighting* using the data stored in the passes. It’s an advanced technique, but the *possibility* exists because you had the data separated. This is the magic of having separate CGI Render Passes.
What about fixing mistakes? Let’s say a texture looks a little too dark in a specific area because of a weird shadow. If you have your passes, you can often isolate that area and brighten *just* the Diffuse pass in that spot, or maybe subtly adjust the shadow information from the lighting passes. Trying to paint out or correct that directly on a flattened Beauty pass would be way harder and might look fake. CGI Render Passes give you surgical precision.
Or think about adding effects. You want rain hitting a window. You can render your scene of the room. Then, separately, render the rain effect on a plane where the window is, maybe with an Alpha pass for the rain droplets. In compositing, you just layer the rain render on top of the room render using the Alpha pass. You can adjust the rain’s transparency, color, speed blur, etc., all in post. You didn’t have to complicate your main 3D scene with the rain simulation, which likely would have increased render times significantly and made iterating on the rain effect much slower. This separation of elements using passes is fundamental to building complex shots efficiently.
Seriously, the ability to adjust lighting intensity, change colors, tweak reflections, add atmospheric effects, isolate objects, and fix subtle errors *after* the main render is done is not just convenient; it’s transformative. It makes the iterative process of refining an image or animation so much faster and less painful. Without CGI Render Passes, professional-level 3D production as we know it wouldn’t really be possible at the speed and quality expected today. They are the unsung heroes of the 3D pipeline.
Integrating Passes into the Workflow: Where Do They Go?
So you’ve set up your 3D software to spit out all these amazing CGI Render Passes. Now what? Where do they fit into the whole process? Think of it like this: your 3D software (like Maya, Blender, 3ds Max) is the kitchen where you prepare all the individual ingredients (the passes). The next step is the assembly line where you put the sandwich together, but with the ability to adjust each ingredient before it goes in. That assembly line is a compositing program.
Popular compositing programs include After Effects (you might have heard of that one, especially if you do motion graphics), Nuke (heavy-duty stuff used in big movies), Fusion (from Blackmagic Design), and even sometimes Photoshop for still images if you save your passes in a layered format or import them as separate files. These programs are designed specifically for taking multiple images or layers and combining them. And they are built to understand and work with CGI Render Passes.
The workflow looks something like this:
- Set up in 3D Software: You build your scene, set up lights, materials, camera, animation. Crucially, you go into the render settings and tell the software *which* passes you want it to output. You might save each pass as its own sequence of image files (like a folder full of .exr or .png files for the Diffuse pass, another folder for the Specular pass, etc.).
- Render: You hit the render button. The software calculates the scene, but instead of just giving you one Beauty pass, it saves out all the individual passes you asked for. This might take a little longer than just rendering the Beauty pass alone, but it’s almost always worth it.
- Import into Compositing Software: You open your compositing program and import the rendered passes. You’ll typically bring in your main Beauty pass (if you rendered one) and then all the individual CGI Render Passes as separate layers or nodes, depending on the software.
- Composite and Adjust: This is where the magic happens. You use the individual passes to build up your final image. You might start with the Diffuse pass, add the Specular pass on top using a specific blending mode (like ‘Add’ or ‘Screen’), add the lighting passes, multiply the Ambient Occlusion pass for contact shadows, use the Alpha pass to mask out elements, use the Depth pass for fog, and so on. The compositing software gives you tools to adjust the brightness, contrast, color, blur, or apply effects to *each* pass independently or in combination.
- Final Output: Once you’re happy with how everything looks, you render the final image or animation sequence from the compositing software. This is your polished, final output, incorporating all the tweaks and adjustments you made using the CGI Render Passes.
This layered, or ‘node-based’ (in programs like Nuke and Fusion), approach is incredibly powerful. It keeps everything non-destructive, meaning you can always go back and change an adjustment you made to a specific pass without affecting anything else. It’s a fundamental pipeline that allows artists to collaborate – the 3D artist focuses on building and rendering the scene with passes, and the compositor focuses on bringing it all together and giving it that final look.
Tips and Tricks I Learned the Hard Way (So You Don’t Have To)
Like anything in 3D, getting CGI Render Passes to work smoothly takes a little practice. I definitely stumbled through some frustrating moments early on. Here are a few tips I picked up that can save you a lot of grief:
- Name Your Passes Smartly: This seems basic, but trust me, when you have 20 different passes rendered for 1000 frames, you need a system. Use clear, consistent names like `ProjectName_Shot01_Diffuse_v001.exr`, `ProjectName_Shot01_Specular_v001.exr`, etc. This makes it easy to import and organize everything in your compositing software. Trust me, finding the right pass in a folder full of ambiguously named files is a nightmare.
- Render to a Good File Format: Don’t just render passes as JPEGs. JPEGs are great for final images but they compress data and lose quality. Use formats that can store more information, especially important for passes like Depth or Normals, or passes that might have values higher than 1 (like bright reflections). OpenEXR is the industry standard – it can store multiple passes in a single file and handles high dynamic range (HDR) data, which means super bright or super dark values are preserved. TIFF or PNG can work for some passes, but EXR is king for a robust CGI Render Passes workflow.
- Check Your Passes Before Compositing: After your render finishes, take a look at the individual pass files *before* you load them into compositing. Do the Alpha passes look correct? Is the Depth pass showing proper distance gradients? Does the Specular pass show the reflections you expect? Catching a problem at this stage (maybe a setting was wrong in the 3D software) is way easier than trying to figure out why your composite looks weird later on.
- Understand What Each Pass Contains: This goes back to the list of common passes. Know what information is stored in each pass and why you need it. Don’t just render *every* possible pass because you can. It increases render time and file size unnecessarily. Think about what adjustments you *might* need to make in post-production and choose passes that give you the control to make those adjustments. If you know you won’t need to change any object colors, maybe you don’t need the Diffuse pass separately, or maybe you do, just in case? It’s a balance, but understanding the purpose of each pass is key.
- Figure Out Compositing Blending Modes: When you bring passes into compositing software, you’re not just layering them like Photoshop layers (though you can do that sometimes). You use specific blending modes or operations. For instance, you might add the Diffuse, Specular, and lighting passes together to reconstruct the Beauty pass. Ambient Occlusion is often multiplied over the result. You’ll need to understand how these operations work to combine your CGI Render Passes correctly. There are tons of tutorials out there covering the basics of reconstructing a render from passes.
- Don’t Be Afraid to Re-Render (Parts): While passes save you from re-rendering *everything*, sometimes you *do* need to re-render a specific element or a specific pass. Maybe the Alpha pass for one object had an issue. You don’t need to re-render all the other passes. Just fix the issue in your 3D scene (like the object’s visibility or material settings) and re-render *only* the Alpha pass for that object. This is still way faster than re-rendering the whole scene. The flexibility of CGI Render Passes extends to targeted re-renders too.
- Think Ahead to Post-Production: As you’re setting up your 3D scene and choosing your passes, try to anticipate what kinds of tweaks you might want to make later. Do you think you’ll want to adjust the sky’s brightness? Maybe render the sky on a separate layer or get a mask for it using an ID pass. Do you want the option to make the robot’s eyes glow? Make sure you have an Alpha or ID pass for the eyes. This foresight is a big part of a successful CGI Render Passes workflow.
Learning these little things made a huge difference in how smoothly my projects went. It’s not just about knowing *what* passes are, but knowing *how* to use them effectively and efficiently. CGI Render Passes are powerful tools, but like any tool, they work best when you understand the best practices for using them.
Choosing the Right CGI Render Passes: Less is Sometimes More
With so many different CGI Render Passes available in modern renderers, it can be tempting to just turn them all on. “More data is always better, right?” Not necessarily! Rendering extra passes increases render time and creates huge file sizes. It also adds complexity to your compositing workflow because you have more layers or nodes to manage.
The key is to choose the passes that are most relevant to your project and the kind of adjustments you anticipate needing. Ask yourself:
- What elements might I need to isolate? (Objects, characters, background, maybe specific parts of an object?) -> Need Alpha, Object ID, Material ID passes.
- Do I need control over reflections or highlights? -> Need Specular pass.
- Do I need control over bounced light? -> Need Indirect or Global Illumination pass.
- Will I need to change colors of specific objects or materials without affecting lighting? -> Need Diffuse pass, plus Alpha or ID passes to isolate.
- Do I plan to add atmospheric perspective (fog, mist) or depth of field blur in post? -> Need Depth pass.
- Do I want to add contact shadows or emphasize crevices? -> Need Ambient Occlusion pass.
- Will I need to do any sort of relighting or complex surface adjustments in compositing? -> Maybe need Normals pass, Position pass.
For a simple project where you just need to swap a background and maybe tweak color correction, you might only need a Beauty pass and an Alpha pass. For a complex VFX shot, you might need dozens of passes. It really depends on the potential post-production work needed. Starting with a core set – Beauty, Alpha, Diffuse, Specular, Depth, Ambient Occlusion, and some ID passes – is usually a solid bet for most general-purpose renders. As you get more experience, you’ll develop an intuition for which additional CGI Render Passes might be useful for specific types of scenes or creative goals. Don’t feel pressured to render everything; be strategic.
The Technical Side Simplified: How Renderers Handle CGI Render Passes
Without getting into the super deep math (because, honestly, that’s beyond 8th-grade level and my goal here is to be practical), let’s just touch on *how* the renderer actually creates these CGI Render Passes. When your 3D software calculates the final image, it’s doing tons of calculations for each tiny dot (pixel) in the picture.
For the Beauty pass, it’s combining all the information: the object’s color, how light hits it directly, how light bounces onto it, what its surface properties are (shiny, rough, transparent), etc. To create the separate passes, the renderer essentially performs some of these calculations but isolates the results. For the Diffuse pass, it calculates what the color would be *without* any direct or indirect lighting applied. For the Specular pass, it calculates *only* the contribution of direct light reflecting off shiny surfaces. For the Depth pass, instead of calculating color, it calculates the distance from the camera to the first surface it hits for each pixel.
Think of it like having a super-smart calculator that, instead of just giving you the final answer to a complex equation, can also show you the result of each step of the calculation if you ask it to. Rendering CGI Render Passes just means telling the renderer, “Okay, calculate the final image, but while you’re at it, also save the intermediate results for the diffuse color, the direct reflections, the depth, and so on.” It’s doing the main work anyway; saving these extra channels of information alongside the main image is just a matter of outputting the data it already generated during the rendering process. This is why rendering passes doesn’t usually *double* your render time; it adds to it, but often not proportionally to the number of passes, because much of the core calculation is shared.
Beyond the Basics: Custom Passes and Advanced Usage
Once you’re comfortable with the standard CGI Render Passes, you might discover that you need something specific that your renderer doesn’t offer out-of-the-box. Many advanced renderers allow you to create custom passes. This usually involves setting up special render elements or outputs based on specific criteria in your scene.
For example, you might want a pass that shows *only* the light contributed by one specific light source in your scene (a ‘Light Group’ pass). This is incredibly useful if you want to adjust the intensity or color of just that one light in post-production. You can often set these up by assigning individual lights to different ‘groups’ and then asking the renderer to output a pass for each group.
Another example might be needing a pass that shows *only* the contribution of a specific object’s reflection onto other objects. This gets pretty technical, but the point is, the system of CGI Render Passes is often extensible. You can dig deeper and configure outputs for very specific data that serves your unique needs in compositing. This level of control is where the true power and flexibility of the render pass workflow shine. It’s not just about breaking down the standard image; it’s about extracting *any* meaningful data from the 3D scene calculation that can be manipulated later. These custom CGI Render Passes are often what separates a standard composite from a truly flexible and robust one.
The Evolution of CGI Render Passes
The concept of separating render elements isn’t brand new, but how accessible and powerful CGI Render Passes are today has definitely evolved. In the early days of CGI, getting any kind of useful separate output was often difficult, requiring complex setups or custom programming. You might get a basic Alpha channel, but detailed passes for reflections or bounced light were either not available or hard to extract cleanly.
As render engines became more sophisticated and computers got more powerful, the ability to calculate and output more types of data became standard. Renderers were built from the ground up with the idea of providing comprehensive CGI Render Passes as a core feature, not just an afterthought. The file formats for storing this data also improved dramatically. The OpenEXR format, for instance, revolutionized the process because it could store many different passes within a single file sequence and preserve a much wider range of color and light information than older formats.
The integration with compositing software also got tighter. Compositing applications developed specific tools and workflows optimized for combining and manipulating render passes efficiently. You no longer had to manually align and try to blend layers using generic tools; the software understood the mathematical relationships between passes and offered dedicated nodes or effects for recombining them correctly. This evolution has made the render pass workflow not just possible, but practical and essential for artists and studios of all sizes. The quality and variety of standard CGI Render Passes available continue to grow with each new release of render software, offering artists unprecedented control over their final images.
Real-World Examples Where CGI Render Passes Were Critical
You see the results of extensive CGI Render Passes usage all the time, even if you don’t realize it. Think about:
- Big Budget VFX Movies: When you see a giant robot fighting an alien in a city, every element – the robot, the alien, the city buildings, the explosions, the laser blasts, the dust, the rain – was likely rendered separately, often with dozens of passes each. The compositing team then took all these pieces (likely hundreds or thousands of different render pass sequences!) and combined them, adjusting the look of each piece to make it all feel like it belongs in the same shot. They might adjust the robot’s reflections to match the environment, add atmospheric haze using depth passes, change the color of an explosion, or fine-tune the shadows the alien casts. CGI Render Passes are the absolute backbone of visual effects pipelines. Without them, the complexity of these shots would be impossible to manage or iterate on.
- Animated Films: In animated movies, characters and backgrounds are often rendered separately. Maybe the characters are rendered with passes optimized for their cartoon-y or stylized look (clean colors, specific outlines), while the background is rendered with passes that allow for depth of field and environmental effects. This separation using passes gives the animation team and the lighting/compositing team the flexibility to make changes right up until the deadline without having to re-render entire complex frames containing everything. Need to make a character pop more against the background? Use their Alpha pass and adjust their brightness or add a subtle outline.
- Product Commercials: When you see a beautifully rendered car or a shiny gadget spinning around in a commercial, CGI Render Passes were almost certainly used. The product itself might be rendered with passes that allow detailed control over reflections, refractions (if it has glass), and highlights to make it look as appealing as possible. The background environment (often CG too) would be rendered separately. The passes allow the artists to ensure the product looks perfect and seamlessly integrated into the scene, adjusting every glint and shadow. Want to make the car slightly more red? Adjust the Diffuse pass. Want to tone down the reflections of the studio lights? Adjust the Specular pass. This granular control is only possible with passes.
- Architectural Walkthroughs: As mentioned before, being able to adjust lighting or add atmospheric effects like fog or haze after the initial render saves immense amounts of time. Using ID passes to isolate different materials (wood, glass, metal) allows for precise color correction or texture adjustments in post-production based on client feedback without lengthy re-renders of the whole building. CGI Render Passes are indispensable here for achieving the desired mood and realism efficiently.
In all these examples, the core principle is the same: break the image down into its constituent parts using CGI Render Passes, allowing for maximum control and flexibility in the final assembly stage. It’s a fundamental technique that underpins almost all high-quality computer graphics output.
Making CGI Render Passes Work for You
Look, at the end of the day, learning about CGI Render Passes might seem like just another technical hurdle in the already complex world of 3D. But I promise you, the payoff is huge. It’s not just about making things look pretty; it’s about working smart. It’s about being able to react to feedback quickly, fix problems efficiently, and have the creative freedom to explore different looks in post-production without the crushing fear of hours or days of re-rendering.
Start simple. Don’t try to learn every single pass at once. Pick a few key ones that make sense for your projects – maybe Alpha, Diffuse, Specular, and Depth. Learn how to render them from your software and how to combine them in a basic compositing program like After Effects or Fusion. Experiment! See what happens when you adjust just the Specular pass or play with the Depth pass. You’ll quickly see the power you gain.
As you get more comfortable, add more passes to your repertoire as needed. Remember the tips about naming conventions, file formats, and checking your passes. Treat your render passes like valuable assets because they are. They represent the raw ingredients you need to cook up your final, polished image.
Mastering CGI Render Passes is a step that elevates your 3D work from just rendering pictures to becoming a true digital artist with precise control over the final look. It’s a skill that is absolutely worth the investment of time and effort to learn. It transformed my workflow and my ability to deliver results I and others were happy with, much faster and with less stress than my early, naive rendering days.
Conclusion
So, wrapping this up, CGI Render Passes are fundamentally about breaking down the complex process of creating a 3D image into manageable, separate pieces of information. This separation gives you unparalleled control and flexibility during the post-production phase, allowing you to make adjustments, fix errors, and explore creative options without the need for lengthy and often frustrating re-renders of the entire scene. From isolating objects and adjusting reflections to controlling lighting contributions and adding depth effects, render passes are an absolutely critical component of any professional or serious hobbyist 3D workflow. They save time, reduce stress, and ultimately help you create better final images and animations. If you’re serious about 3D, diving into render passes is one of the smartest things you can do for your skills and your sanity.
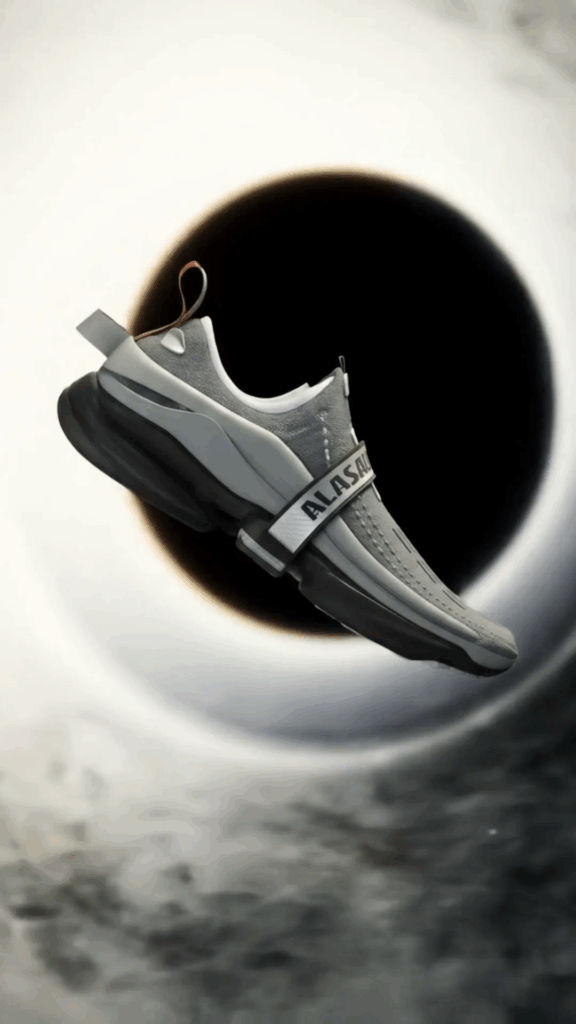
Want to see what kind of results are possible when you utilize these techniques effectively? Check out www.Alasali3D.com. Curious to learn more specifics about CGI Render Passes? You might find resources at www.Alasali3D/CGI Render Passes.com useful.