The Details in 3D Design. It sounds kinda simple, right? Like, yeah, okay, details matter. We get it. But honestly? In the world of making stuff in 3D, those little details? They’re not just important. They’re *everything*. They’re the secret sauce, the hidden magic that turns something that looks just ‘okay’ into something that makes people stop and go, “Whoa. How’d they *do* that?”
I remember when I first started messing around with 3D. Like, way back. I was so focused on getting the basic shape right. Was it a chair? Did it look kinda like a chair? Cool, move on! I’d make rooms that were just boxes with furniture blobs inside. Characters were smooth, perfect, like they were carved out of plastic that had never been touched. And it was… fine. But it felt flat. Lifeless. Like looking at a toy instead of the real thing.
The turning point for me, and really where I started to understand The Details in 3D Design, was when I was trying to make an old, worn-out wooden crate. My first attempt was just a brown box with some lines for planks. Looked terrible. Then, I started looking at *real* old crates. I saw the nicks in the wood, the grain you could feel with your finger, the way the paint was chipped around the edges, the rust on the nails holding it together. And I thought, “Okay, *that’s* what’s missing.”
Adding those little things in 3D? That’s when the crate suddenly felt heavy, like it had a history. It wasn’t just a brown box anymore. It was an *old, beat-up crate*. And that feeling, that sense of reality or story just from tiny imperfections, that’s the power of The Details in 3D Design.
Why The Details in 3D Design Are Your Best Friends
Seriously, if you’re making anything in 3D, big or small, simple or super complex, the details are what give it soul. Think about it. When you look at something in the real world, you’re not just seeing the main shape. You’re seeing the texture, the little scratches, how light bounces off it, the tiny gap where two pieces meet. Our brains are wired to pick up on those things. So when we see a 3D model, and those things are missing, it feels… off. Like something’s not right.
Adding those small touches makes your 3D work:
- Look Real (or believably unreal): Even if you’re making a fantasy creature or a sci-fi spaceship, details ground it in reality. A monster with leathery skin texture and tiny scars feels more present than one with smooth, featureless skin.
- Tell a Story: A coffee cup with a ring stain on the table next to it tells you someone was just there. A sword with nicks on the blade tells you it’s been used in battle. Details are mini-storytellers.
- Feel Solid and Physical: Think about how a chair feels in 3D. If the edges are perfectly sharp and it has no texture, it might look like it’s floating. But add a slight bevel to the edges, show the grain of the wood, add some tiny scuffs on the legs? Suddenly, it feels like it has weight, like you could actually sit on it. This is the magic of The Details in 3D Design.
- Grab Attention: In a crowded online world, good details make your work stand out. People appreciate the effort and craftsmanship that goes into getting the small things right.
It’s like cooking. The main ingredients are the big shapes and colors. But the salt, the pepper, the herbs, the spices? Those are the details. They might seem small on their own, but they’re what make the whole dish taste amazing. Without them, it’s bland.
And The Details in 3D Design are exactly like that. They add the flavor, the richness, the ‘oomph’ that takes your 3D work from just okay to absolutely stunning.
Learn more about the importance of details
Where Do The Details in 3D Design Hide? (Everywhere!)
Okay, so where do you even start looking for details? The cool (and sometimes overwhelming) thing is, they are literally everywhere in a 3D scene. Let’s break it down by a few different areas you might be working in.
Architecture & Environments
Making buildings or outdoor spaces? Details are your best friends for making them feel lived-in and real.
- Wear and Tear: Nothing in the real world stays perfect forever. Look for chipped paint on a wall corner, scuff marks near a doorway, worn patches on a wooden floor where people walk a lot, cracks in the pavement.
- Imperfections: Walls aren’t perfectly flat. Floors aren’t perfectly level. Bricks aren’t all the exact same shape and color. Adding slight variations makes things feel built, not just plonked down.
- Little Objects: Don’t just put in the main furniture. Think about the stuff that piles up. A stack of magazines on a table, a half-empty water glass, a pair of shoes by the door, leaves scattered on the ground outside. These are The Details in 3D Design that tell a story.
- Natural Elements: How does moss grow on that stone wall? Are there weeds pushing through the cracks in the sidewalk? How does the bark look on that specific type of tree?
- Texture Variation: Even on one surface, the texture isn’t uniform. A wooden table might be smoother in the middle where it’s used, and rougher near the edges. Metal might be polished in one spot and scratched in another.
Think about walking into an old building. You see the layers of paint, the worn steps on a staircase, the dust motes dancing in a sunbeam showing imperfections on the glass. Capturing that feeling in 3D environments relies entirely on getting The Details in 3D Design right.
Product Visualization
Making a cool gadget, a piece of furniture, or some other item? Details sell the quality and realism.
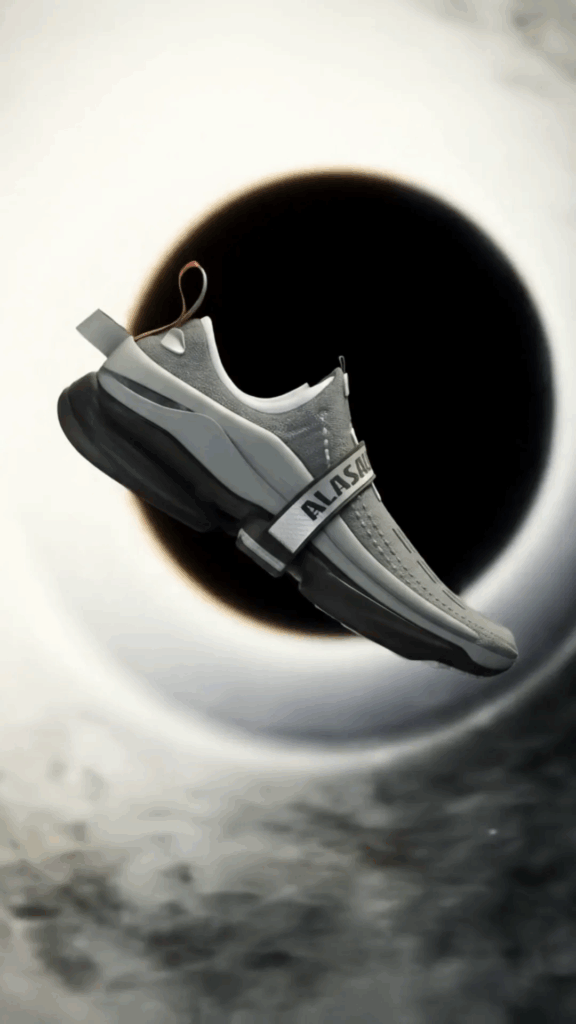
- Surface Finishes: Is it matte? Glossy? Does it have a metallic flake? Is it slightly rough? The way light interacts with the surface tells you a lot about the material.
- Seams and Panel Gaps: How are the different pieces put together? There’s usually a tiny gap or a seam line. These seem small, but they define the form and construction.
- Buttons and Knobs: These aren’t just cylinders or boxes. They have tiny textures, maybe a little indicator line, a slight curve to fit a finger.
- Labels and Logos: These need to sit correctly on the surface, maybe slightly debossed or raised. Is the label peeling slightly?
- Fingerprints and Smudges: Especially on glossy surfaces, subtle smudges make it feel like a real object that’s been handled.
- Tiny Scratches and Dings: Unless it’s fresh out of a super clean box, most products have some minor signs of handling or manufacturing imperfections.
When you see a beautiful render of a product online, like a watch or a phone, it’s not just the main shape that looks good. It’s the way the light catches the tiny bevel on the edge of a button, the subtle texture on the strap, the perfect reflection showing the quality of the finish. That’s The Details in 3D Design doing their job.
Characters & Creatures
Bringing digital beings to life? This is where details get really personal.
- Skin Details: Pores, tiny wrinkles, blemishes, moles, subtle veins, peach fuzz hair. These are incredibly complex but key to realistic skin.
- Clothing Details: Fabric weave, wrinkles, seams, stitching, loose threads, wear on collars or cuffs, buttons, zippers, pockets. How does the fabric drape and fold?
- Hair and Fur: Not just a block of color, but individual (or simulated individual) strands, the way light hits them, how they fall.
- Eyes: The iris texture, the tiny blood vessels in the whites, the wetness of the surface, the reflection. Eyes are often called the windows to the soul, and in 3D, The Details in 3D Design in the eyes are crucial for making a character feel alive.
- Hands and Feet: Wrinkles on knuckles, fingernails (maybe a little dirt under them?), calluses. These areas show character and history.
- Prosthetics, Armor, Accessories: These items need their own set of details – scratches on metal armor, worn leather on a belt, intricate carvings on a staff.
Making a character feel real isn’t just about getting the face right. It’s about the subtle details everywhere, the tiny imperfections that make them unique and believable. A monster’s scales, a hero’s battle scars, the wrinkles around an old person’s eyes – The Details in 3D Design breathe life into digital actors.

How We Actually Add The Details in 3D Design
Okay, so we know details are important and they’re everywhere. But how do you actually put them *in* your 3D model? It’s not like just drawing a little line. It involves a bunch of different techniques, often used together.
Modeling Details
This is about changing the actual shape of your 3D model.
- Bevels/Chamfers: Instead of a perfectly sharp edge (which rarely exists in reality), we round it slightly. This is HUGE for realism, as it catches highlights and makes objects feel less like flat-shaded geometry. Even the sharpest knife has a tiny bevel.
- Extrusions and Insets: Pulling parts out or pushing them in to create buttons, screws, panel lines, borders, etc.
- Adding Geometry: Sometimes you need to model small parts separately and attach them, like bolts, handles, or decorative elements.
- Subdivision and Sculpting: This is where you take a basic shape and add millions of tiny polygons so you can literally “sculpt” in fine details like wrinkles, fabric folds, wood grain, or rocky surfaces. Think of it like digital clay. This is a big part of creating organic The Details in 3D Design.
Modeling details give your object its fundamental form and structure, including those small but important physical features.
Texturing Details
This is perhaps where *most* of the visible details come from, especially the surface imperfections.
Texturing isn’t just about slapping a color on something. It’s about telling the surface how to look and behave. We use different types of “maps” (images or procedural patterns) that control different things:
- Color Map (Albedo/Diffuse): The basic color, but also subtle variations in color, maybe a dirt layer in the crevices, or paint chips revealing a different color underneath.
- Roughness Map: This map tells the surface how shiny or dull it is. Details here could be greasy fingerprints (shiny spots), worn areas (shinier), or dusty patches (dull). This map is critical for realism and showing wear in The Details in 3D Design.
- Metallic Map: Tells the surface if it’s metal or not. Combined with roughness, this gives you polished chrome, rusty iron, painted metal, etc.
- Normal Map / Bump Map: These maps fake small bumps and dents on the surface using lighting information. You can add wood grain, fabric weave, scratches, or skin pores without actually modeling them into the geometry. This is super powerful for adding tons of visual The Details in 3D Design efficiently.
- Height Map (Displacement Map): Similar to normal maps, but this one actually *pushes* the geometry up or down based on the map’s values. Great for things like brick walls, rocky ground, or intricate carvings where you need real depth.
- Ambient Occlusion Map: This map helps simulate where light gets “stuck” in crevices, making those areas look darker. Adding this often makes details like cracks and seams pop out.
Creating these textures involves painting, using photo references, or generating them procedurally (like with software that can make realistic rust or wood patterns). It’s a whole art form in itself, and mastering texture maps is key to making The Details in 3D Design look believable.
Sculpting Details
As mentioned under modeling, sculpting is a specialized way to add very high-resolution details, often using tools that feel like sculpting clay. This is where you’d create the fine wrinkles on a character’s face, the scales on a dragon, the texture of bark on a tree, or dents and damage on a car.
Sculpting allows for a very organic and artistic approach to adding complex surface The Details in 3D Design that would be incredibly difficult or impossible with traditional polygon modeling.
Lighting Details
This might seem weird, but even lighting contributes to how we perceive details. How light hits a surface reveals its texture and form. A harsh, raking light across a wall will emphasize every tiny bump and imperfection, while soft, diffuse light might hide them. Placing lights carefully can draw attention to important The Details in 3D Design you want the viewer to see.
It’s usually a combination of these techniques that brings a 3D model to life. You might model the main shapes and seams, sculpt in the fine surface imperfections, and then use textures to add color, wear, and finer bumps. Getting the workflow right for The Details in 3D Design is part of the learning curve.

The Never-Ending Quest for The Details in 3D Design
Here’s the thing about details in 3D: you could pretty much keep adding them forever. There’s always one more scratch, one more subtle variation, one more tiny object you could place. Knowing when to stop is almost as important as knowing what details to add.
When I was working on a scene of an old workshop, I spent hours and hours adding tiny tools, sawdust on the floor, grease stains on the workbench. At some point, my computer was starting to chug because the scene was getting so heavy, and honestly, it was getting cluttered. It wasn’t adding to the story anymore; it was becoming distracting. I had gone past the point of diminishing returns. I had to step back, delete some stuff, simplify other areas, and focus only on the The Details in 3D Design that really mattered for the feeling I was trying to create.
This balance is something you learn with experience. You start to develop an eye for what details are important for a specific object or scene and which ones might just be overkill. Sometimes, less is more, but ‘less’ doesn’t mean ‘none’. It means choosing the *right* details.
One common mistake I see, especially with folks starting out, is making details too uniform or too perfect. Like adding scratches that are all the same length and direction, or wood grain that repeats perfectly without variation. Real-world details are messy, organic, and imperfect. They have history. If you’re adding dirt, think about *how* the dirt would get there – would it be in the crevices? Smeared on the handle? Would rain have washed it away in some spots? Thinking about the *why* behind the detail makes it feel much more believable and adds to The Details in 3D Design.
Also, don’t forget the context! The level of detail you need depends heavily on how the 3D model will be used. If it’s going to be seen far away in a wide shot, you probably don’t need to sculpt every single skin pore. But if it’s going to be featured up close in a product render or character animation, those tiny The Details in 3D Design become absolutely critical.
It’s a process of observation and iteration. You look at reference images (tons of them!), you add details, you look at your render, you compare it to reality or your concept, and you refine. Maybe that scratch doesn’t look quite right. Maybe the texture on that fabric looks too flat. Maybe you need a few more bits of clutter on that desk. It’s a constant back and forth of adding and adjusting The Details in 3D Design.
Sometimes, getting The Details in 3D Design right feels like detective work. You’re studying how the world works, how objects age, how materials behave, and then trying to translate that understanding into the digital realm. It requires patience and a willingness to look closely at the small stuff that most people might not even consciously notice, but that their brains register on a deeper level as ‘real’.
This is where having a good library of textures and reference photos comes in super handy. You can study how rust forms, how paint peels, how leather wrinkles, how water stains wood. Building up this visual library helps you understand the patterns and randomness of real-world The Details in 3D Design so you can recreate them convincingly.
And let’s not forget about the tools! Software today gives us incredible power to add details. Sculpting programs like ZBrush or Mudbox let you add millions of polygons to push and pull forms like digital clay, getting those super fine surface bumps and wrinkles. Texturing software like Substance Painter or Mari allow you to paint directly onto your 3D model, layering different materials, dirt, wear, and procedural effects to create rich, complex surfaces that are full of The Details in 3D Design. Even traditional 3D software like Blender, Maya, or 3ds Max have powerful tools for modeling bevels, adding subdivisions, and applying and manipulating texture maps. Understanding which tool is best for adding which kind of detail is part of becoming a skilled 3D artist.
For example, you wouldn’t typically sculpt large, structural beams into a building model; you’d model those. But you *might* sculpt the subtle unevenness of a hand-cut stone wall or the intricate carvings on an old wooden door. Similarly, you wouldn’t usually model every single thread in a piece of fabric, but you would use textures (like normal or displacement maps) to create the *appearance* of that weave and sculpted wrinkles to show how the fabric folds and bunches, adding crucial fabric The Details in 3D Design.
It’s really about choosing the right technique for the right kind of detail and the right level of realism you’re aiming for. A cartoony character might only need painted-on textures to suggest wrinkles, while a highly realistic digital double would require intricate sculpting and multi-layered texture maps for the skin pores, fine hairs, and subtle color variations.
And the process isn’t always linear. You might model the basic shape, then sculpt high-frequency details, then go back to tweak the underlying model geometry because you realized something about the form needs adjusting based on the details you’ve added. Or you might start texturing and realize the modeled bevels aren’t quite right for how the paint should chip, so you go back and adjust the modeling. It’s a loop of refinement, always focusing on how the The Details in 3D Design are contributing to the overall look and feel.
The Payoff: Why All This Detail Work Is Worth It
So, yeah, adding details can be time-consuming. It takes patience. It takes practice. It means looking really, really closely at the world around you. But the payoff? Oh man, the payoff is huge.
- Credibility: When your 3D looks real and believable, people trust it more. Whether it’s an architectural visualization selling a design, a product render showing off an item, or a character in a film, getting The Details in 3D Design right builds credibility.
- Immersion: For games, VR, or animated films, details pull the viewer in. They help the audience forget they’re looking at something made of polygons and textures and just get lost in the world you’ve created.
- Emotional Connection: The wear and tear on an object can evoke feelings – nostalgia, toughness, neglect. A character’s subtle facial details can convey emotion more powerfully than just the main expression. The Details in 3D Design are key to this.
- Professionalism: Attention to detail is a hallmark of professional work in any field, and 3D is no exception. It shows you care about quality and craft.
- Personal Satisfaction: There’s a unique joy in seeing a 3D model come to life because you took the time to add those small, thoughtful touches. It transforms from a digital object into something that feels tangible and real to you. This is the ultimate reward of focusing on The Details in 3D Design.
I’ve had moments where I’ve worked on a tiny detail for ages – maybe a specific kind of rust pattern, or the way a seam wrinkles on a piece of cloth – and when I finally get it right and see it in the final render, it just clicks. That one small thing, combined with all the other small things, elevates the entire piece. It feels solid. It feels *right*. That’s the magic of The Details in 3D Design at work.
It’s also worth noting that learning to add good details isn’t just about learning software. It’s about developing your eye. It’s about becoming a better observer of the real world. The more you pay attention to the small stuff around you, the better you’ll become at recreating it in 3D. Look at the ground you walk on, the clothes you wear, the objects on your desk. How do they look up close? What are the tiny things that make them look like *them*?
Sometimes I’ll just spend time looking at photos of objects with interesting textures or wear patterns, like old leather bags, rusty metal pipes, or worn wooden furniture. I’m not looking for a whole object to copy, but specific examples of The Details in 3D Design – how does the scratch break across different parts of the material? How does the dirt accumulate in the corners? How does the light catch that specific texture? These observations are fuel for creating believable details in my own 3D work.
And it’s not just about physical details. The Details in 3D Design can also be in the presentation. Think about small environmental details in a scene – dust motes, a subtle haze in the air, a stray leaf blowing across the ground. These atmospheric details add depth and realism without necessarily being part of the main object itself. Or consider animation details – a character shifting their weight slightly while standing, or a subtle eye dart. These are also forms of detail that contribute massively to the final result.
For me, embracing The Details in 3D Design transformed how I approach my work. It stopped being just about building shapes and started being about crafting experiences, telling stories through visuals, and bringing digital creations to life in a way that resonates with viewers on a deeper level. It takes time, effort, and a good dose of patience, but the ability to add compelling details is, in my opinion, one of the most valuable skills any 3D artist can develop.
It makes your art richer, your visualizations more convincing, and your characters more relatable. It’s the difference between something that looks like it was made in a computer and something that feels like it exists. The Details in 3D Design make all the difference in the world.
Getting Started with Details
If you’re just starting out or feeling overwhelmed by the idea of adding all these tiny bits, don’t stress. You don’t have to add every single detail you see in reality right away. Start small.
- Focus on Key Areas: For a product, focus on the edges and the main touch points like buttons or handles. For a character, maybe start with the face and hands. For an environment, focus on the area the viewer will see up close.
- Use Reference: I can’t say this enough. Find photos or even real-life objects to look at. See how light hits them, where wear occurs, what the surface texture looks like up close. Reference is your map for The Details in 3D Design.
- Learn Your Software: Understand the tools you have for adding details. How do you apply textures? How do normal maps work? Can you easily bevel edges? Start with the basics and build up.
- Practice Texturing First: Often, textures (especially roughness and normal maps) give you the biggest bang for your buck in terms of adding perceived detail quickly without making your model geometry super heavy.
- Add Imperfections Sparingly At First: Start with just a few subtle scratches or a little bit of dirt. Don’t go overboard until you’re comfortable.
- Get Feedback: Show your work to others and ask them what feels fake or what looks good. Sometimes a fresh pair of eyes will spot something you missed.
Remember my sad little wooden crate? It started simple. Then I added visible planks and nails (modeling). Then I added a wood grain texture (texturing). Then I added variations in color and darkness in the texture (texturing refinement). Then I added chipped paint around the edges and rust on the nails (more texturing). Then I added a slight bevel to the edges so the light would catch them better (modeling detail). Each step was adding a layer of The Details in 3D Design, building up the realism and the story bit by bit.
It wasn’t one giant leap; it was a series of small steps, each focused on observing the real world and translating a specific detail into 3D. That’s how you approach it – one detail at a time, layering them up to create a rich and convincing final result. The journey of mastering The Details in 3D Design is a long one, filled with observation and practice, but it’s incredibly rewarding.
Think about your favorite video game character, or an amazing CGI creature from a movie, or a stunning architectural visualization you saw online. Chances are, what made you love it wasn’t just the overall design, but the incredible attention paid to The Details in 3D Design. The stitching on the character’s costume, the way the monster’s skin glistens, the fallen leaves scattered realistically on the virtual pavement. These are the things that make digital worlds feel alive.
And the exciting part is that the tools and techniques for adding details in 3D are constantly improving, allowing artists to push the boundaries of realism and creativity even further. What was incredibly difficult or impossible just a few years ago might be much more achievable now. Keeping up with these advancements is part of the journey, but the fundamental principles of observation and understanding how details contribute to the overall look remain constant.
So, next time you’re working on a 3D project, take a moment to look closer. Zoom in. Think about the small things. What tiny detail could you add that would make it just a little bit more real, a little bit more interesting, a little bit more *yours*? That willingness to focus on The Details in 3D Design is what will set your work apart.
The Power of Observation: A Personal Reflection on The Details in 3D Design
I mentioned earlier how crucial observation is, and I really want to hammer that home. When you get serious about The Details in 3D Design, the world around you changes. You start seeing things differently. A walk down the street becomes a study in concrete cracks and rust stains on drainpipes. Sitting in a coffee shop, you’re not just drinking coffee; you’re examining the wear on the wooden table, the way light reflects off the ceramic mug, the subtle wrinkles on the barista’s apron. Every object, every surface, every bit of wear and tear becomes potential reference material for your 3D work. It’s like unlocking a hidden layer of reality.
This kind of observation isn’t just about looking; it’s about analyzing. Why does the paint chip *there*? Because that’s where people’s hands touch it the most. Why is the wood darker in that spot? Maybe it’s from spills or sweat. Why are the scratches on this metal object mostly running in one direction? Perhaps it was frequently slid across a rough surface. Understanding the *cause* of a detail helps you recreate it more authentically in 3D. It gives The Details in 3D Design a history, a reason for being there.
I remember working on a character model, and I was struggling to make the leather jacket look right. It just felt too… perfect. I pulled up tons of reference images of old, worn leather jackets. I looked at the creases around the elbows, the way the leather was smoother in areas that got a lot of friction, the subtle cracking patterns in other spots, the texture of the stitching, the tiny scratches around the zipper. It wasn’t just about adding *some* wrinkles; it was about adding the *right kind* of wrinkles in the *right places*. The Details in 3D Design needed to tell the story of that specific jacket being worn by that specific character. By observing the real-world examples so closely, I was able to add those subtle variations and imperfections that finally made the digital jacket feel like real, old leather. It wasn’t just a texture; it had weight, history, and a sense of being lived-in.
This level of focus on The Details in 3D Design can be demanding, but it’s also incredibly rewarding. It pushes you to be a better artist, to see the world with more clarity, and to translate those observations into your digital creations. It’s a skill that develops over time, with each project offering new challenges and opportunities to refine your eye for detail. Whether you’re aiming for photorealism or a stylized look, understanding and intentionally placing details will elevate your work.
It’s easy to overlook The Details in 3D Design when you’re caught up in the big picture – getting the main forms right, setting up the lighting, figuring out the camera angle. But the difference between good 3D and *great* 3D often comes down to those tiny elements. They are the unsung heroes of realism and visual storytelling. They are the silent language that speaks volumes to the viewer, often without them even realizing why something looks so convincing or appealing.
So, my advice to anyone in 3D, whether you’re just starting or have been doing it for a while: fall in love with The Details in 3D Design. Make observation a habit. Spend time looking at the world, and then spend time looking at your 3D work with a critical eye, comparing it to reality. Ask yourself: What tiny thing is missing here? What could I add or change that would make this feel more real, more tangible, more interesting? It’s in those small, deliberate choices where the true magic of 3D design often lies.
And remember, it’s not about adding details just for the sake of adding them. Every detail should ideally serve a purpose, whether it’s to show the object’s history, indicate its material, guide the viewer’s eye, or simply add visual interest. Thoughtful details are powerful; random details are just noise. This is a key principle in understanding The Details in 3D Design.
This is a skill that grows with practice and intention. The more you look, the more you see. The more you try to replicate what you see, the better you become at doing it. Don’t get discouraged if your first attempts at adding details aren’t perfect. Mine certainly weren’t! It’s an ongoing learning process, a journey of discovery both in the real world and in the digital one. But the effort you put into mastering The Details in 3D Design will pay dividends in the quality and impact of your 3D art.
Check out other 3D design topics
Conclusion: The Details in 3D Design Make All the Difference
So, there you have it. From my experience messing around with 3D for a while now, if there’s one thing I’ve learned, it’s this: never underestimate The Details in 3D Design. They’re the unsung heroes that elevate your work from good to great. They add realism, tell stories, create atmosphere, and grab attention. They are the tiny puzzle pieces that, when put together thoughtfully, create a stunning and convincing final image or animation.
Whether you’re sculpting pores on a character, adding subtle wear to a product, or scattering leaves in an environment, taking the time to focus on The Details in 3D Design is an investment that always pays off. It requires observation, patience, and practice, but the ability to breathe life into your digital creations through attention to the small stuff is one of the most rewarding aspects of working in 3D.
So, next time you’re working on a project, challenge yourself to go beyond the basic shapes and colors. Zoom in. Look closer. Find the details. Add the imperfections. Tell the story with the small stuff. You’ll be amazed at the difference it makes. Focusing on The Details in 3D Design is a skill that will truly make your work shine.
Want to see how attention to detail makes a difference? Check out www.Alasali3D.com and specifically learn more about this topic at www.Alasali3D/The Details in 3D Design.com.