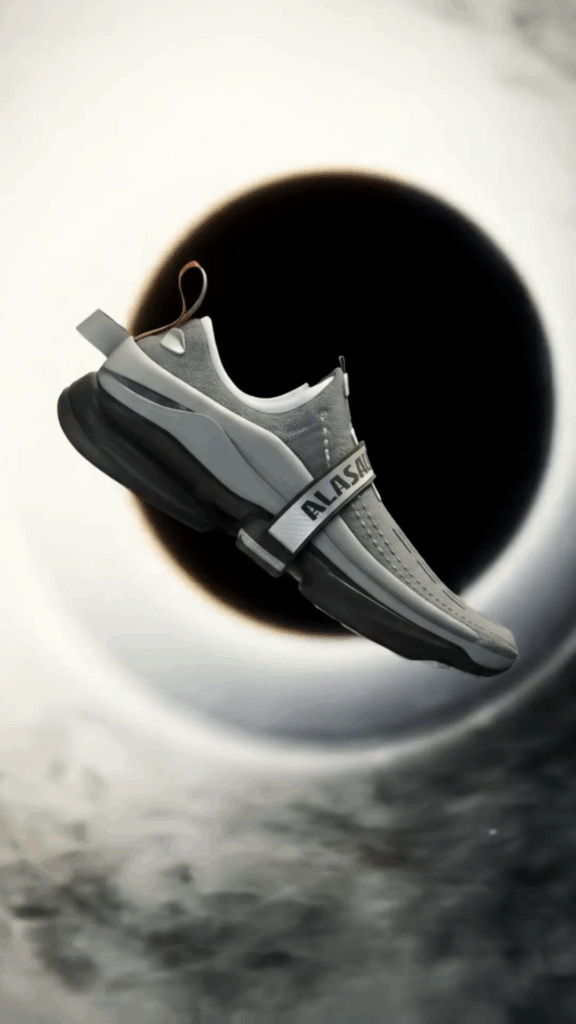
Create Your 3D Masterwork: It’s Not as Scary as You Think
Create Your 3D Masterwork. Sounds a bit intense, right? Like something only super-techy wizards with fancy degrees can do? Nah. Let me tell you, from someone who’s spent a good chunk of time messing around in the digital clay-pit, it’s way more accessible and a whole lot more fun than you might imagine. It’s about bringing your ideas to life in a totally new way, one virtual shape at a time. Think of it like building with LEGOs, but the LEGOs can be literally anything you dream up.
So, What Even IS a “3D Masterwork”?
Alright, let’s get this straight. When I say “Create Your 3D Masterwork,” I’m not saying you have to immediately churn out the next Pixar movie or design a perfect replica of the Eiffel Tower on your first try. A masterwork isn’t necessarily something the entire world will instantly crown as a masterpiece (though hey, maybe!). It’s more personal than that. It’s *your* masterwork. It’s the thing you pour your ideas and effort into, the project that makes you proud when you finally see it finished. It could be a simple cup, a funny character, a cool spaceship, or a cozy room. It’s whatever *you* want to create and feel good about creating.
My own journey into this world started pretty randomly. I saw some cool stuff online people had made in 3D and thought, “Whoa, how’d they do that?” I was convinced it required some kind of secret knowledge or expensive equipment. Turns out, it requires curiosity, patience, and a willingness to just dive in and try stuff. My first attempts? Let’s just say they were… rough. Really rough. Like, “is this supposed to be a table or a lumpy potato?” rough. But that’s okay! Every single person who is good at this started exactly there. The trick is just not stopping.
Why Bother? What’s the Point of Creating in 3D?
Why spend time to Create Your 3D Masterwork? Simple: it’s ridiculously cool. It’s a superpower, honestly. You have an idea in your head – maybe it’s a creature, a piece of furniture, an entire futuristic city – and you can actually *build* it in a virtual space and look at it from every angle. You can make it look shiny, old, fuzzy, rocky, whatever. You can put lights on it and make dramatic shadows. You can even make it move if you get into animation. It’s a fantastic way to express yourself, tell a story, or just build something awesome for the sheer fun of it. It opens up a whole new playground for your imagination.
Getting Started: What Gear and Software Do You Need to Create Your 3D Masterwork?
Okay, let’s talk turkey. What do you *actually* need to get rolling and start to Create Your 3D Masterwork? The good news is you probably already have the most important thing: a computer. You don’t need a super-fancy gaming rig right off the bat, though obviously, a more powerful computer helps things run faster later on. But to start learning the basics, most standard laptops or desktops will do.
The next thing is the software. This is where the magic happens, where you actually sculpt, shape, and color your virtual objects. And guess what? Some of the most powerful 3D software out there is completely free. Yep, free. The big one I recommend checking out, and the one a ton of people start with (including me!), is called Blender. It can do pretty much everything the expensive software can do, and there are mountains of free tutorials online to help you figure it out. It might look intimidating at first with all its buttons, but think of it like the dashboard of a car – you only need to know what the steering wheel, gas, and brake do to get moving. You learn the rest as you go.
Other options exist, of course, some paid, some free or cheaper for students, but seriously, start with Blender. It’s the most welcoming entry point for most folks looking to Create Your 3D Masterwork without dropping cash upfront. Learning software is a process, just like learning an instrument or a new sport. It takes practice, and you’ll have moments where you’re totally confused, but then suddenly, it clicks.
Learn more about choosing your first 3D software
Idea Time: Finding Your Vision for Your 3D Masterwork
Before you can Create Your 3D Masterwork, you need… well, an idea! This doesn’t have to be some grand, earth-shattering concept. Start small. Like, really small. My first few things were a simple donut (there’s a famous beginner tutorial for this!), a basic table and chair, or just messing around with different shapes. Pick something you think is cool or something you see around you every day.
Look for inspiration everywhere. Is there a cool toy on your desk? A weird-shaped rock outside? A favorite mug? A character from a game or cartoon you like? Snap a photo, sketch it out on paper, or just keep the image in your head. The important thing is to have a target, something you’re trying to make the computer understand. Don’t feel pressured to be original right away. Copying something you see is a fantastic way to learn how the shapes and details come together. You’re learning the language of 3D, and imitation is a great teacher when you’re just starting to Create Your 3D Masterwork.

Blocking Out: The First Shapes of Your Masterwork
Okay, you’ve got your software open, you’ve got your idea. Now what? You start building! In 3D, this often begins with “blocking out.” Think of this like making the rough skeleton or the basic clay form before you add details. You start with simple shapes – cubes, spheres, cylinders, cones. You push, pull, stretch, and combine these basic shapes to get the rough outline of your object.
If you were making a simple character, you might start with a sphere for the head, a cylinder for the neck, a stretched cube for the body, cylinders for arms and legs, and so on. You’re not worried about making it look perfect yet. You’re just getting the proportions and the main forms right. It’s like drawing a stick figure before you add clothes and hair. This stage is super important because it lays the foundation for everything else. If your basic shape is wrong, adding details later won’t fix it. This is where you start to see your idea taking physical (well, virtual physical) form, and it’s a really exciting part of the process when you are working to Create Your 3D Masterwork.
Detailing: Adding the Finer Stuff to Make It Pop
Once you have the main shapes blocked out, it’s time to refine them. This is where you start adding details. You might add more edges and points to your shapes to give you more control. You can use tools to sculpt or mold the surface, adding bumps, curves, wrinkles, or sharp corners. If you’re making a character, this is where you’d shape the nose, eyes, and mouth. If it’s a mechanical object, you’d add bolts, seams, and specific cut-outs.
This stage can take a while, depending on how complex your idea is. It’s a process of adding layer upon layer of detail. You zoom in close, tweak a few points, zoom out to see how it looks, then zoom back in. It’s a back-and-forth dance between big picture and tiny details. Patience is key here. Sometimes adding a tiny little bevel (a slight rounding of an edge) can make a huge difference in how realistic an object looks, especially when light hits it. This is often where your object stops looking like simple shapes stuck together and starts looking like the actual thing you imagined for your efforts to Create Your 3D Masterwork.
Adding Life: Textures and Materials
Okay, you’ve got your shape looking good. But right now, it probably looks like smooth, gray plastic. Not exactly exciting, right? This is where textures and materials come in! This is the part where you tell the computer what your object is made of – is it wood, metal, glass, fabric, rock, skin?
Materials define how light interacts with the surface. Does it reflect light like polished metal? Does it absorb light like dark fabric? Is it transparent like glass? Does light pass through it like skin or wax? You set properties like color, shininess (specular), roughness (how scattered the reflections are), transparency, and more.
Textures are like wrapping paper for your 3D model. They are 2D images that you apply to the surface. A wood texture makes your object look like it has a wood grain. A brick texture makes it look like a brick wall. You can also use textures to add fine details that would be too difficult or impossible to model geometry, like scratches, dirt, rust, or even the pattern on a character’s shirt. You map these images onto your 3D shape, telling the software which part of the image goes on which part of the model.
Combining materials and textures is how you make your 3D creation feel real and grounded in the world. It’s like painting your sculpture. You can spend forever tweaking these settings to get just the right look. This step dramatically transforms your work and is vital to help you Create Your 3D Masterwork that feels complete.
Dive deeper into materials and textures in 3D

Lighting Your World: Making it Look Dramatic or Natural
Imagine taking a photo of something really cool, but doing it in a dark room with no lights. You wouldn’t see much, right? Lighting is just as important in 3D, maybe even more so. How you light your scene completely changes the mood and how your object looks.
In 3D software, you can add different types of lights, just like in real life. You have point lights (like a light bulb), sun lights (like the sun, casting parallel rays), spot lights (like a stage light), and area lights (like a softbox for photography, giving softer shadows). You can change their color, brightness, size, and position.
The shadows your lights create are also super important. Hard shadows from a small, bright light can make things look dramatic and sharp. Soft shadows from a larger light source look more natural. Placing lights carefully can highlight the best parts of your model and hide the parts you don’t want to emphasize. Good lighting can make a simple model look amazing, and bad lighting can make an amazing model look… meh. Learning to light is a skill in itself, and it’s crucial when you are trying to Create Your 3D Masterwork that really stands out.
Explore the basics of 3D lighting
Setting the Scene: Composition and Camera Angles
You’ve got your object, its materials look great, and you’ve added some lights. Now, how do you show it off? This is where composition and camera work come in, just like in photography or filmmaking. You need to decide what the viewer is going to see and from what angle.
You place a virtual camera in your 3D scene. You can move it around, tilt it, zoom in or out. Think about the “rule of thirds” if you’ve heard of it – placing your main subject off-center can often make an image more interesting. Consider the background – is it distracting? Does it add to the mood? What about the foreground?
The camera angle can totally change how your object feels. A low angle can make something look powerful and imposing. A high angle can make it look smaller or more vulnerable. A straight-on shot can feel more like a product photo, while an angled shot with some perspective distortion can feel more dynamic. Experiment with different camera placements until you find the view that best shows off your Create Your 3D Masterwork.
Rendering: The Big Finish (And Waiting Game)
Okay, your scene is set up – model, materials, lights, camera. You see it all on your screen in the software, but it’s usually just a preview, not the final high-quality image. To get that final image, you need to “render.”
Rendering is the process where the computer calculates how all the light rays bounce around your scene, how they interact with your materials, and what the camera sees. It’s basically the computer taking a super high-tech photograph of your virtual world. This process requires a lot of computer power, especially if you want a high-quality image with realistic lighting and shadows. Depending on your computer, the complexity of your scene, and the quality settings you choose, rendering can take anywhere from a few seconds to several hours, or even days for complex animations! It’s often the part where you hit the render button and go make a sandwich, watch a show, or maybe even go to sleep.
When the render is finished, you get a final 2D image (or a sequence of images if you’re animating) that represents your 3D scene. This is the final output of all your hard work to Create Your 3D Masterwork in its polished, visible form. Seeing that final image pop up after waiting is one of the most satisfying feelings in 3D art.
Understand the rendering process in 3D
Post-Processing: Adding Little Tweaks
After you’ve rendered your image, you might think you’re done. And you *can* be. But often, artists take the rendered image into a 2D image editor (like Photoshop, GIMP – which is free, or even just simple photo apps) for some final touches. This is called post-processing or post-production.
You might adjust the colors slightly, make the image a bit brighter or darker, boost the contrast, add a subtle blur to the background, or maybe add a little bit of glow or haze. These are the same kinds of tweaks you might do to a photograph to make it look its best. It’s like putting the final coat of polish on your work. It can help your rendered image pop and feel even more finished, truly completing the look of your Create Your 3D Masterwork.
Sharing Your Masterwork: Show It Off!
You did it! You worked hard, pushed through the tricky bits, and you have your finished 3D creation. Now what? Share it! There are tons of online communities and platforms where 3D artists hang out and share their work. Websites like ArtStation, DeviantArt, and even social media platforms like Instagram and Twitter are great places to show off what you’ve made. Don’t be shy! Get feedback from others. It’s super valuable – people might point out things you didn’t notice or give you ideas for your next project. Sharing your journey and showing the world you can Create Your 3D Masterwork is part of the fun and helps you connect with other people who are into the same stuff.
Discover places to share your 3D art online
Troubleshooting Common Headaches
Let’s be real: learning 3D can be frustrating sometimes. Things will go wrong. Shapes will do weird things you didn’t expect. Lights won’t behave. Renders will come out black or glitchy. It happens to everyone, from total beginners to seasoned pros. It’s part of the learning process. Don’t get discouraged!
When you hit a wall, the first step is usually to undo your last action. Did that fix it? No? Okay. Did you follow the tutorial steps exactly? Did you accidentally click something you shouldn’t have? Google is your absolute best friend when troubleshooting 3D problems. Chances are, someone else has had the exact same issue and asked about it online. Look for forums, Q&A sites (like Stack Exchange), and tutorial comments sections. Don’t be afraid to describe your problem and ask for help in friendly online communities. Learning to troubleshoot is a major skill you develop as you learn to Create Your 3D Masterwork.
Common problems include:
- Weird shading: Often caused by messed-up geometry (overlapping faces, holes).
- Black renders: Usually a lighting or camera issue. Is the camera pointed at the scene? Are the lights turned on and bright enough?
- Slow performance: Your scene might be too complex for your computer, or you might have too many subdivisions on your models.
- Textures not showing up: Check your material settings and make sure the texture is properly mapped onto the model.
Just breathe, take a break if you need to, and tackle the problem step-by-step. You’ll figure it out.
Learning More and Growing Your Skills
Creating one 3D object is awesome, but it’s just the beginning. There is always, always, always more to learn in 3D. The software updates, new techniques are developed, and your own ideas get more ambitious. To keep growing, keep learning! There are endless free tutorials on YouTube covering every single topic you can imagine – specific tools, entire workflows, making specific types of objects (like characters, buildings, cars, nature). Websites like CG Cookie, Skillshare, and Udemy offer structured courses (some free, some paid) that can take you deeper into specific areas.
Follow artists you admire online and see how they work (some share their process!). Try to recreate things you see. Challenge yourself with new projects that push your skills. Maybe you started with still objects, and now you want to try animating. Maybe you want to learn how to sculpt organic shapes instead of hard surfaces. The 3D world is vast, and there’s a lifetime of learning available. The more you learn, the more complex and amazing the things you can Create Your 3D Masterwork will become.
Find more resources to learn 3D
It’s a Marathon, Not a Sprint
I know I’ve covered a lot of steps here, from ideas to rendering and sharing. It might seem like a ton of work just to Create Your 3D Masterwork. And yeah, it takes effort and time. But remember, you don’t have to become an expert overnight. This is a journey. Each project you complete, even a small one, teaches you something new. You get faster, you understand the tools better, and your results improve. Don’t compare your first few projects to someone else’s work after years of experience. Compare your current work to your *last* work. That’s where you’ll see the real progress.
There will be days when you feel like you’re not getting anywhere, or when a project is driving you crazy. That’s normal! Take breaks, work on something simpler for a bit, or just step away and come back with fresh eyes. The passion to Create Your 3D Masterwork is what will keep you going through the tough spots.
Your Masterwork is Yours Alone
Ultimately, what makes something your “3D Masterwork” isn’t about likes or comments online, or whether it looks exactly like something real. It’s about the effort you put in, the skills you learned along the way, and the fact that you took an idea from your head and made it exist in 3D space. It’s a reflection of your creativity and your perseverance. So go ahead, dive in. Mess around. Experiment. Don’t be afraid to make mistakes. That’s how you learn. And eventually, you will Create Your 3D Masterwork that is uniquely yours.
Conclusion
Taking the leap to Create Your 3D Masterwork is about embarking on an exciting creative adventure. It starts with just an idea and a willingness to learn some new digital tools. From shaping basic forms and adding intricate details to applying realistic textures, setting the perfect lighting, and finding the best camera angle, each step brings your vision closer to reality. The rendering process brings it all together into a final image, which you can then polish and share with the world. While challenges will pop up, the journey of learning and creating is incredibly rewarding. So, grab that software, find an idea, and start building. Your 3D masterwork is waiting for you to bring it to life.
Ready to start or continue your 3D journey?
Visit Alasali3D.com for more inspiration and resources.
Learn specifically about creating your 3D masterwork at Alasali3D.