Photorealistic 3D Rendering Secrets: Making Pixels Look Real
Photorealistic 3D Rendering Secrets. Man, where do I even start? If you’ve ever seen a 3D image or animation that made you squint and think, “Wait, is that real or fake?” – you’ve witnessed the magic of photorealism. For years, I’ve been deep in the trenches of 3D, pushing buttons, tweaking settings, and pulling my hair out trying to make digital stuff look like it actually exists in the world. And let me tell you, it’s less about some hidden cheat code and more about understanding how light, surfaces, and cameras work… and then tricking the computer into seeing it that way.
When folks ask me how I make my 3D renders look so real, they often expect me to name a specific software feature or a magic setting. Sure, software matters, but the real secret sauce isn’t in the code; it’s in the artist’s eye and understanding the real world. It’s about observation, patience, and a willingness to get nerdy about tiny details.
Think about it. We see the world through our eyes, which are essentially incredibly complex cameras connected to a supercomputer brain. Our brains are constantly analyzing light, shadow, reflections, textures, and tiny imperfections to figure out what something is and if it’s “real.” When you’re creating a photorealistic 3D rendering, you’re trying to feed enough of those visual cues to someone else’s brain so *their* brain says, “Yep, that looks like it could be sitting right here.” It’s a cool kind of visual psychology, I guess.
It’s a journey, for sure. My first renders looked… well, let’s just say they screamed “COMPUTER GRAPHICS!” from the rooftops. Over time, by studying real photos, paying attention to how light bounces off different materials, and learning to use my tools properly, things started clicking. The journey to mastering Photorealistic 3D Rendering Secrets is ongoing, but there are definitely some fundamental principles that make a huge difference.
What Even *Is* Photorealistic Rendering, Anyway?
Okay, let’s level set. “Rendering” in 3D means taking the digital model you’ve built, added materials to, lit, and placed a camera in front of, and turning it into a 2D image or a sequence of images (like a movie). “Photorealistic” just means making that final image look like a photograph taken with a real camera, in a real place.
Why bother? Well, for starters, it’s incredibly useful. Architects can show clients exactly what a building will look like before it’s built. Product designers can show off their latest gadget before it’s manufactured. Filmmakers can create scenes that would be impossible or too expensive to film for real. Marketing, visualization, art – the applications are everywhere. Making something look real gives it weight, believability, and impact.
Getting to that level of realism isn’t just about hitting a “make it real” button. It involves a bunch of interconnected steps, and if you mess up one, it can throw the whole image off. It’s a bit like baking a cake; you need the right ingredients (models, materials, textures), mixed in the right way (lighting, composition), and baked at the right temperature (render settings, post-processing) to get a tasty result. Miss one ingredient or step, and… well, you get the idea.
This is where the pursuit of Photorealistic 3D Rendering Secrets really begins. It’s not just technical; it’s artistic and observational. You have to become a bit of a detective, constantly asking, “How would this look in reality?”
The Superstar: Lighting
If there’s one thing that makes or breaks a photorealistic render, it’s lighting. Seriously. You can have the most detailed model and the most amazing textures, but if your lighting is flat or unrealistic, the whole thing falls apart. Light is what allows us to see shapes, judge distances, and understand the mood of a scene. In 3D, it’s the same deal.
Think about real life. Light comes from sources – the sun, a lamp, a fire. It travels, hits objects, bounces off them (Global Illumination), gets absorbed, and creates shadows. Those shadows aren’t just black blobs; they have soft edges if the light source is big (like a cloudy sky) and hard edges if the light source is small and sharp (like a bare bulb). The color of the light matters too – a candle’s light is warm and orange, while a clear sky on a sunny day is cooler and bluish.
In 3D, we try to mimic this. We place digital light sources. There are different types: directional lights simulate the sun (light rays are parallel), point lights are like bare bulbs (light radiates in all directions), spot lights are like flashlights (focused cone of light), and area lights are like soft boxes or windows (light comes from a surface, creating softer shadows). Using the right *type* of light for the situation is fundamental.
But it’s not just placing lights. It’s about how they interact with the scene. bounced light – Global Illumination (GI) – is super important. When light hits a wall, it doesn’t just stop; some of it bounces off and illuminates other parts of the scene, often picking up the color of the surface it bounced from. That’s why the underside of a red ball on a white table might have a faint red glow on the table around it. GI makes a scene feel connected and realistic. Without it, objects look like they’re just floating in a void, even if they have shadows.
Using HDRI (High Dynamic Range Imaging) maps is another huge part of realistic lighting, especially for environments. An HDRI is basically a 360-degree photograph of a real environment (like a park at sunset or a studio with softboxes). When you use this as a light source in your 3D scene, it bathes your models in the *exact* lighting conditions of that real place, including the complex interplay of direct light, bounced light, and ambient light from all directions. It’s an incredibly powerful tool for achieving believable exterior or interior lighting quickly. Many of the best Photorealistic 3D Rendering Secrets revolve around how you set up your lighting environment.
Placement is key. Where you put your lights, how intense they are, what color they are – these all dramatically affect the mood and realism. A common technique is the three-point lighting setup (key, fill, back) borrowed from photography and film, but you also need to consider environmental lighting. Are there windows? Lamps? How does light filter through leaves? Observing real scenes is the best teacher here. Take photos, study how light behaves at different times of day, and try to replicate that in your 3D software. Overlighting is a common mistake; often, less is more. Subtle variations in light and shadow are far more convincing than blasting everything with bright, uniform light.
Shadows are just as important as the light itself. The softness or sharpness of a shadow tells you about the light source’s size and distance. The color of the shadow can be influenced by the color of the bounced light hitting it. Getting shadows right adds depth and grounds your objects in the scene. Ignoring these details leads to that tell-tale “CG” look. Mastering the nuances of light and shadow is probably the single biggest step towards uncovering Photorealistic 3D Rendering Secrets.
Beyond basic light types, you also need to think about details like volumetric lighting (god rays or fog), caustics (light focusing through glass or water), and lens effects (like bloom from bright lights). While some of these are added in post-processing, having the lighting set up correctly in the 3D scene is the foundation.
Ultimately, realistic lighting isn’t just about making things visible; it’s about telling a story and guiding the viewer’s eye. It creates mood, highlights important features, and makes the difference between a bland image and one that pops. Spend time studying photography and cinematography – they are invaluable resources for learning how to light a scene effectively and realistically.
The Unsung Heroes: Materials and Textures
Okay, if lighting is the superstar, then materials and textures are the entire supporting cast and the set design combined. Light has to land on *something*, and what it lands on dictates how it bounces, reflects, and absorbs. This is where materials come in. Making surfaces look real is crucial for Photorealistic 3D Rendering Secrets.
Gone are the days of simple diffuse colors. Modern photorealistic rendering relies heavily on Physically Based Rendering (PBR) workflows. This sounds technical, but the core idea is simple: instead of just guessing how a material looks, we define its properties based on how light *actually* interacts with that type of substance in the real world. This makes materials look correct under *any* lighting condition, which is a game-changer.
What are these properties? Let’s break down the most common ones you’ll deal with:
- Albedo (or Base Color): This is the basic color of the surface. But here’s the trick: for non-metallic objects, this color should be fairly flat and contain no lighting information (no baked-in shadows or highlights). The lighting takes care of that.
- Metallic: Is the material a metal (like steel, gold, copper) or not (like plastic, wood, fabric)? This is usually a simple yes (1) or no (0) value, or a grayscale map if you have areas that are metal and areas that aren’t (like painted metal where the paint is worn off). Metals behave fundamentally differently with light than non-metals; they reflect light differently and don’t have a diffuse color in the traditional sense.
- Roughness (or Glossiness): This is HUGE. This property determines how scattered the reflections are. A perfectly smooth surface (low roughness) will have sharp, clear reflections (like a mirror). A rough surface (high roughness) will scatter reflections in all directions, making the surface look matte or dull (like concrete). This is often represented by a grayscale map, where darker values are smoother and lighter values are rougher. Subtle variations in roughness maps are key to realism – nothing is perfectly smooth everywhere.
- Specular: For non-metallic materials, Specular controls the intensity of the reflections at grazing angles. It’s less intuitive than Roughness but important for getting realistic plastic, glass, or wood. In some PBR workflows, this is linked to the base color or a fixed value.
- Normal (or Bump) Map: This doesn’t actually change the geometry of your model, but it *fakes* surface detail by telling the renderer how light should react as if there were bumps and dips. A normal map is a special colored texture (usually blue/purple/reddish) that stores directional information. Bump maps are simpler grayscale maps just indicating height. These maps are essential for adding fine details like wood grain, fabric weaves, or scratched surfaces without making your 3D model incredibly complex with millions of polygons.
- Height (or Displacement) Map: Unlike normal maps, a displacement map *does* actually push and pull the geometry of your model based on a grayscale texture, where white is high and black is low. This is used for larger details like bricks, cobblestones, or rough terrain where just faking it with a normal map isn’t convincing enough. It requires a more detailed model (or tessellation during rendering) to work properly.
- Ambient Occlusion (AO) Map: While AO can be a lighting/rendering setting, an AO map is a texture that defines areas where ambient light should be blocked (like crevices, corners, or where objects meet). This helps ground objects and adds subtle contact shadows, making things look more solid and realistic.
- Opacity Map: Controls transparency. White is fully opaque, black is fully transparent, and shades of gray are semi-transparent (like frosted glass or mesh fabric).
- Subsurface Scattering (SSS): This is for materials where light doesn’t just bounce off the surface but also penetrates a little way *into* the material before scattering around and exiting. Think of skin, wax, leaves, or milk. It gives that soft, translucent look and is vital for realistic organic subjects.
So, to make a realistic material, you often need multiple texture maps – not just a color image. You need maps for roughness, normal/bump, potentially metallic, height, etc. Where do you get these maps? You can create them yourself using texture painting software, get them from online libraries (many offer full PBR sets), or even generate them procedurally based on patterns and noise.
The quality and resolution of your textures are also critical. A low-resolution texture stretched over a large object will look blurry and fake. Seamless textures are important so they tile without obvious seams. Also, paying attention to the *scale* of the texture relative to your object is vital. Wood grain should be the right size, fabric weaves shouldn’t be gigantic, etc.
But it’s not just about applying textures. It’s about understanding how real materials weather and age. A perfect, uniform material often looks fake. Think about a wooden table – it might have scratches, water rings, areas where the varnish is worn, dust collecting in crevices. A metal object might have fingerprints, smudges, rust spots, or wear on edges. Adding these subtle variations and imperfections using layered textures, masks, and procedural techniques makes a massive difference in convincing the viewer that the material is real and has a history. These small details are key Photorealistic 3D Rendering Secrets.
Creating realistic materials is an art form in itself. It requires observation of the real world, understanding the physics of light, and knowing how to translate that into your software’s material system. It often involves a lot of tweaking – adjusting roughness values, playing with specular levels, layering different texture maps, and seeing how the material looks under different lighting conditions. It’s a process of refinement, and getting it right is incredibly rewarding. The interplay between lighting and materials is where the magic happens in Photorealistic 3D Rendering Secrets.

One specific technique I often rely on is using grunge maps or imperfection maps, especially in roughness channels. A perfectly uniform shiny surface rarely exists outside of a sterile lab. Adding a subtle map that breaks up the reflection pattern with fingerprints, dust spots, or micro-scratches instantly makes a surface more believable. Even clean objects like new cars or polished furniture have micro-scratches or subtle variations in their clear coat. Paying attention to these tiny, often overlooked details elevates a render significantly and is a true insider tip for improving Photorealistic 3D Rendering Secrets.
Also, don’t forget the edges. In the real world, edges of objects are rarely perfectly sharp. They’re usually slightly rounded, worn down, or chipped. Adding bevels to your models (even tiny ones) or using techniques in materials to simulate worn edges (like procedural wear or edge masks) can make a huge difference in how light catches the object and makes it feel solid rather than a sharp, digital cutout.
Modeling: It’s About Form, Not Just Detail (Usually)
Of course, you need something to apply those materials and light! Modeling is the process of creating the 3D shapes in your scene. While having a well-modeled object is fundamental, achieving photorealism doesn’t always mean modeling every single tiny screw or pore (unless your camera is going to be right up close). The level of detail needed in your model depends heavily on how close the camera will be and what the object is made of.
For objects in the background, a simpler model with good textures and materials can be perfectly convincing. For hero assets – the main focus of your render – you’ll need more detail. But even then, focus on the important shapes and how light interacts with them. As mentioned before, adding subtle bevels to edges makes a huge difference in how light reflects and defines the shape.
Topology, or how the polygons are arranged, is important too, especially if your object needs to bend or deform (like a character for animation). For still renders, topology might be less critical unless it affects how subdivision surfaces smooth the mesh or how textures wrap.
Sometimes, getting realistic results means not even modeling something yourself. Using high-quality scanned 3D models (photogrammetry) for complex objects or environments can provide an incredible level of detail and realism that’s hard to match by modeling from scratch. Libraries of scanned assets are becoming increasingly popular for this reason.
The main point here is that while good modeling is essential, don’t think that photorealism is *solely* about having the most polygons. A great model with poor lighting and materials will look fake, while a reasonably good model with excellent lighting, materials, and post-processing can look incredibly real. Modeling provides the canvas, but the painting happens with light and materials. It’s a crucial step, but often not the *most* challenging part of achieving Photorealistic 3D Rendering Secrets compared to the subtle art of lighting and texturing.
The Unavoidable Truth: Imperfection is King
Okay, I touched on this with materials, but it deserves its own moment. One of the quickest ways to spot a fake 3D render is when everything is *too* perfect. In the real world, nothing is pristine. Surfaces have micro-scratches. Corners are slightly worn. Dust settles. Paint is chipped. Fingers leave smudges. Wood has variations in its grain. Concrete has cracks. Nothing is perfectly aligned, perfectly clean, or perfectly uniform.
Adding these subtle imperfections is one of the most powerful Photorealistic 3D Rendering Secrets. It tells a story about the object and its environment. A clean, shiny object looks like it just came off the factory line (which might be what you want sometimes!), but a slightly worn object looks like it’s been used, lived with, and is part of the real world.
How do you add imperfections? Layers! Using texture maps to control things like:
- Subtle scratches or smudges on glossy surfaces (affecting roughness and maybe albedo slightly).
- Dust or dirt accumulation in crevices (using AO maps or procedural masks).
- Edge wear (subtly changing albedo or roughness on corners).
- Variations in color or sheen across a large surface.
- Fingerprints on glass or polished metal.
These details often aren’t even noticeable consciously, but subconsciously, our brains recognize the pattern of wear and tear from the real world and interpret the image as more believable. It takes time and observation to get this right. Look at objects around you – how is the paint worn on your phone? Where are the scratches on your desk? Where does dust settle? Replicating these tiny details digitally makes a huge difference in unlocking Photorealistic 3D Rendering Secrets.
This principle of imperfection also extends to the scene itself. Maybe a floor isn’t perfectly level. Maybe objects aren’t placed in a rigid grid but slightly off-kilter. Adding a touch of natural randomness or wear makes the scene feel lived-in and real.
Camera and Composition: Framing Reality
This is another area where borrowing from real-world photography and cinematography is crucial. A photorealistic render is trying to look like a photograph, so how you set up your virtual camera matters just as much as a real photographer’s choices.
Focal Length: Different lenses behave differently. A wide-angle lens (low focal length like 20mm) can distort perspective and make things near the edges look stretched. A telephoto lens (high focal length like 200mm) compresses perspective and makes the background seem closer to the foreground. Using an appropriate focal length for your scene and subject helps sell the realism. Often, something around a 35mm or 50mm equivalent (like what our eyes see roughly) feels natural for many scenes.
Depth of Field (DOF): In photography, not everything is in sharp focus. DOF is the range of distance that is in focus. By blurring the foreground or background, you can direct the viewer’s eye to the subject that is in focus. Realistic DOF, with convincing bokeh (the look of the out-of-focus highlights), is essential for mimicking photos, especially portraits or close-ups. It adds a sense of scale and realism that a perfectly sharp image lacks.
Motion Blur: If anything is moving in your render, adding realistic motion blur (blur caused by the camera or object moving during the exposure time) is vital for animation. A single sharp frame from a moving object looks unnatural.
Composition: This is all about how you arrange the elements within the frame. Rules like the rule of thirds, leading lines, negative space, and framing elements aren’t just artistic choices; they help guide the viewer’s eye and make the image more appealing and believable. A well-composed render feels more like a deliberate photograph. Even something as simple as slightly rotating an object off-axis or placing it slightly off-center can make it feel more natural than a perfectly symmetrical, straight-on shot.
Think about camera height and angle too. Shooting from a very low or very high angle can feel unnatural unless that’s the specific effect you’re going for. Eye-level shots often feel most relatable. Using a tripod metaphorically (keeping the camera steady unless motion is intended) also adds to the photographic feel. Considering how a real person with a real camera would capture this scene is a great mindset to adopt.
The Final Polish: Post-Processing
This is where a good render becomes a *great* render. Post-processing, often done in 2D image editing software after the 3D render is finished, mimics what photographers and filmmakers do to their images. It’s the final layer of Photorealistic 3D Rendering Secrets.
Things like:
- Color Correction and Grading: Adjusting the colors, contrast, and brightness to enhance the mood and make the image pop. Matching the colors to a specific look (like a film stock or a particular time of day).
- Levels and Curves: Adjusting the distribution of tones (blacks, whites, mid-grays) to add contrast and punch.
- Vignette: Subtly darkening the edges of the frame, which is a common optical effect in real lenses and helps focus attention on the center.
- Chromatic Aberration: A subtle color fringing effect that happens in real lenses, especially in high-contrast areas. Use sparingly!
- Lens Flares and Bloom: Adding highlights or glows around bright light sources. Can easily look fake, so use with extreme caution and realism in mind.
- Adding Grain or Noise: Real photos have grain (especially older ones or digital noise in low light). Adding a subtle layer of noise can make a digital render feel more like it was captured by a physical sensor.
- Sharpening: Enhancing edge definition slightly.
Post-processing shouldn’t be used to fix fundamental problems with your 3D render (like bad lighting or materials), but it’s essential for giving it that final, polished, photographic look. It’s like putting the finishing touches on a painting. It can subtly unify the image, enhance the mood, and correct minor imperfections. Don’t underestimate the power of this step in making your Photorealistic 3D Rendering Secrets truly shine.
Putting It All Together (It’s a Symphony)
Okay, so we’ve talked about lighting, materials, textures, modeling, imperfections, camera, and post-processing. The real trick to Photorealistic 3D Rendering Secrets isn’t just doing each of these things well in isolation. It’s about how they all work *together*. They need to feel like they belong in the same scene, under the same lighting, with the same camera.
If your lighting is harsh but your materials are set up for soft diffused light, it won’t look right. If your model has perfectly sharp edges but your environment implies wear and tear, there’s a disconnect. If your camera has realistic depth of field but your materials are uniformly shiny everywhere, it breaks the illusion.
Think of it like a band. Each musician needs to be skilled, but they also need to play together, in time, following the same sheet music (or jamming in the same key!). Lighting dictates how the materials look, materials dictate how the light behaves, the model provides the form for both, imperfections add realism to everything, the camera frames the view, and post-processing harmonizes the final image. When all these elements are working in concert, that’s when you achieve true Photorealistic 3D Rendering Secrets.
This is why iteration is so important. You rarely nail it on the first try. You’ll render something, look at it, notice the reflections on that surface look wrong, go back and tweak the roughness map, re-render, maybe adjust a light intensity, re-render again. It’s a cycle of refinement based on observation and comparison to reality.
Referencing real-world examples constantly throughout this process is non-negotiable. Have reference photos of similar objects, materials, and lighting conditions open while you work. Don’t guess how metal looks; look at photos of metal. Don’t guess how shadows fall; look at photos with similar light sources. This direct comparison is invaluable for identifying what’s missing or what looks fake in your own render.
Common Oopsies (We’ve All Made Them)
Along the path to photorealism, you’re gonna stumble. It’s part of learning. Here are some common mistakes I and pretty much everyone else have made:
- Too Perfect Materials: Everything is too clean, too uniform. No variations, no imperfections.
- Flat Lighting: Too much ambient light, not enough directionality or contrast. No clear light source.
- Uniform Shadows: Shadows that are the same softness/hardness everywhere, lacking realistic transitions.
- Wrong Scale: Textures are too big or too small for the object. Bump maps are too intense. DOF blurring is unrealistic for the object’s size.
- Overly Complex Scenes (Too Early): Trying to light and render a massive, detailed environment before understanding how to make a single object look real. Start small!
- Ignoring Reference: Just trying to make something look real from memory instead of looking at actual photos.
- Rushing Post-Processing: Trying to fix bad 3D work in 2D instead of using post-processing for enhancement.
- Ignoring the Edges: Models with perfectly sharp, unrealistic edges.
- Bad Texture Seams: Obvious tiling where textures repeat.
- Unrealistic Reflections: Reflections are too strong, too weak, or the wrong color/roughness for the material.
Recognizing these common issues is the first step to fixing them. If something looks “off,” try to identify which of these areas might be the culprit. Is it the light? The way the light hits the material? Is the material too clean? Is the shadow too sharp?
Another point related to scale and materials is the concept of Fresnel. Fresnel is the effect where the reflectivity of a surface increases at grazing angles (when you look at it from a shallow angle). Think about a polished floor – when you look straight down, you see the floor color more, but when you look across the floor towards the horizon, you see more reflection of the ceiling or lights. Most rendering engines handle this automatically with PBR materials, but understanding *why* it happens helps you troubleshoot if a material doesn’t look quite right at certain angles. It’s a subtle yet crucial detail in Photorealistic 3D Rendering Secrets.
The Real Secret? Practice!
Okay, okay, maybe there isn’t one single “secret” code word for Photorealistic 3D Rendering Secrets. If I had to boil it down, the real magic is understanding the fundamentals of light and materials, having a keen eye for detail and imperfection, and most importantly, practicing. A lot.
Nobody becomes a master overnight. It takes time, experimentation, failed renders, studying tutorials, looking at the work of artists you admire, and constantly observing the real world around you. Each render you create, whether it’s amazing or just “meh,” teaches you something new.
Start simple. Try to make a single sphere look like a realistic billiard ball. Then try a cube that looks like worn wood. Then try lighting a simple scene with a few basic shapes. Gradually build up your complexity as you get a feel for how light, materials, and textures interact. Don’t be afraid to experiment and break things; that’s often how you learn the most.
Surrounding yourself with inspiration helps too. Look at photography, cg renders you admire, study how physical objects look in different lighting conditions. Train your eye to see the nuances – the soft edges of distant shadows, the subtle color shifts in bounced light, the way reflections break up on slightly rough surfaces.
The tools we have today are incredibly powerful, allowing us to achieve levels of realism that were science fiction not that long ago. But the tools are only as good as the artist using them. Your understanding of the underlying principles is far more important than knowing every single button in your software. Master the fundamentals, develop your observational skills, and put in the hours. That, my friends, is the true path to unlocking Photorealistic 3D Rendering Secrets.
Conclusion
So there you have it – my perspective on making 3D renders look real. It’s a blend of technical knowledge, artistic vision, and a whole lot of patient tweaking. It’s about light behaving like light, materials feeling like they have physical properties, imperfections that tell a story, and a camera that frames the world convincingly. There’s no single button for Photorealistic 3D Rendering Secrets, but rather a collection of techniques and a mindset focused on replicating reality in the digital realm.
It’s a challenging but incredibly rewarding pursuit. The feeling when you finally get a render that fools someone into thinking it’s real? Priceless. Keep learning, keep experimenting, and most importantly, keep observing the beautiful, imperfect real world around you. It’s the best reference library you could ever ask for.
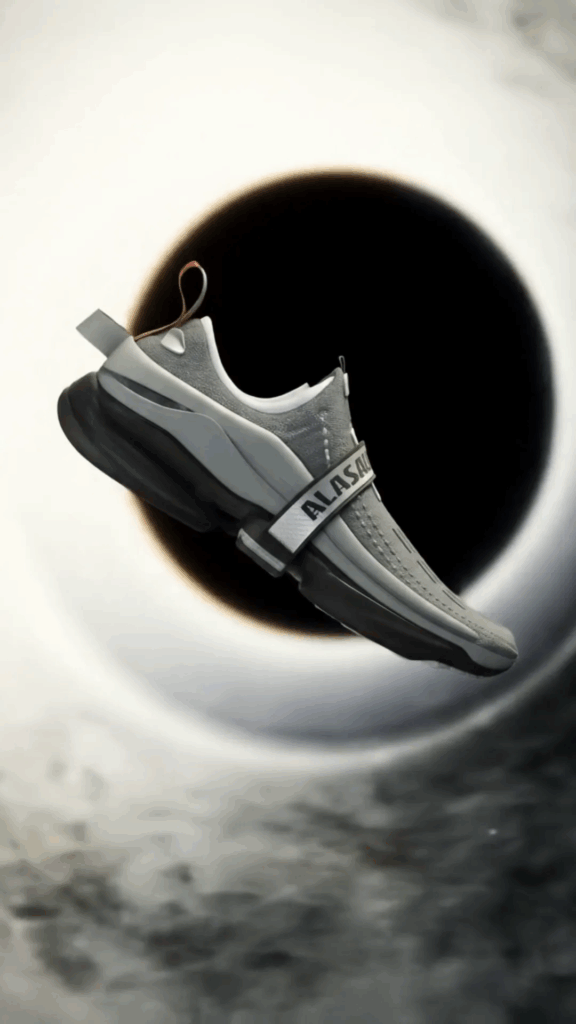
Want to see what’s possible with these techniques or learn more? Check out www.Alasali3D.com for examples of photorealistic work.
And if you’re keen to dive deeper into the specifics we talked about today and explore more Photorealistic 3D Rendering Secrets, you can find further insights at www.Alasali3D/Photorealistic 3D Rendering Secrets.com.
Happy rendering!